Friday, May 27, 2011

8 Recycling Uses for Plastic Bottles

Before discarding that next plastic bottle, take a look at it with new eyes to see if it has an additional use.WATER & SODA BOTTLES
1- Try cutting the bottoms out of 1 and 2 liter bottles, removing the caps and planting them upside down in your flower beds. Filling them with water when your plants need a drink will direct moisture deep into the ground, to the plant roots, where it's needed.
2- Surely most have gotten an email about adding a bottle top to a zipper type bag. It seemed like busy work to me since the bags already open and close. But I tried it on a large bag of rice and it's really quite handy because the bag can be reduced in size as the contents are used. Simply cut the neck of the bottle off, as shown above, and thread the open top of the plastic bag through.
To keep the bag from slipping out of the bottle neck, I've folded it back and secured it with a rubber band. Replace the cap and there you go!
MILK BOTTLESMilk Bottles have many uses.
3- One of my favorites is as a freezer container for casseroles. When the bottle is cut just below the handle (as shown), the resulting "bowl" holds the right amount for a square casserole dish. For a layered casserole, layer the contents in reverse order. When you're ready to use it, turn it upside down in the casserole dish to thaw.
4- The "milk bottle bowl" is also a good size for freezing an ice block of punch. Freeze additional punch instead of water and it will not only stay cold it will not dilute the punch.
5- The "milk bottle bowls" are also great inserts for the summer picnic cooler to keep items from ending up in the melted ice water.
For the Garden:
6- With the bottoms cut out, they make perfect, little greenhouses for starter plants in the early spring, protecting the tender leaves from the cold. Save the bottoms. They can be planted, (with the top edge just at the top level of the dirt) and filled with water for trapping insects and slugs.
In Addition:
7- Milk bottles and gallon bleach bottles, when filled with water, make great hand weights and they are absolutely FREE.

FLAT BOTTLES WITH A SIDE HANDLE
8- I was introduced to this bright idea while out to sea, on a boat with no head. You can take it from there. The size and shape of the cut bottle helps level the playing field between little girls and little boys when nature calls at inopportune times.
Click HERE to link to a ton of unusual uses for plastic bottles - from making mouse traps to building houses with them.

Monday, May 23, 2011

Memorial Day - 2011

There will be no Memorial Day family bar-b-que at my house this year. I won't even make it to the service at the war memorial. I am under the weather and most of my children are far away. So, this year, instead of being busy with preparations and planning a moment of reflection, I find myself just remembering... remembering "thank you"s to the Military at airports, the previously unknown Sailors we'd invite to share Thanksgiving dinner, the flag I placed at my father's grave and the flag folded in silence and given to my niece at the funeral of my little brother. Memorial Day is confusing to me. In part, I am strengthened, standing tall and proud, uplifted by the Lee Greenwood song "I'm Proud to be an American - where at least I know I'm free..." The other part of me is reduced to tears as the haunting notes of "Taps" sounding from a solitary bugle replay in my mind. I think of my brother and father and husband and of the boys in my high school classes who traded youth for a uniform and I want to say "thank you" but some are no longer here. Then I notice the red, white and blue of our flag against our clear Florida sky and I know that as long as that flag flies, as long as there are those of us who truly cherish our liberty, our fallen are never forgotten. Every Memorial Day, I find myself balancing on this same emotional see-saw, and every Memorial Day, I eventually recover my equilibrium. What I conclude is this: that Memorial Day actually is a two-sided coin: the heartbreaking sadness of sacrifice and the abundant blessing of the liberty it has secured. THANK A SERVICE MEMBER AND FLY THE FLAG PROUDLY
(All photographs on this blog are protected under Copyright)
I give permission to download and use any of my American Flag photographs.
Click HERE to access the collection.


Wednesday, May 18, 2011

Being Prepared for a Sudden Emergency

UPDATED NOTE:Prayers for the Joplin, MO tornado victims of yesterday.
There is a significant difference in an emergency and a tragedy. This year has already taken "emergency" to the extreme.
We are witnessing the tragedies of earthquakes & tsunami in the news, millions of acres burning in Texas, record setting tornadoes in Alabama and other southern states, the Mississippi is flooding...and hurricane season is just days away. No amount of preparation will see us safely through all circumstances but it will help is through most of them.
Whether at home or away, with family or with family scattered, most emergencies happen without warning. In the immediacy of the moment, your mind will rush to a number of things: what is the phone number of the children's school, how much cash is in my wallet, what do we do for food, we only have the clothes on our backs. And, if the emergency leads to actual loss, contact information will be most needed and loss of family photos will be most heartbreaking.
Click HERE to access an entire section on Preparedness.
In the meantime, here are some basic preparation measures that all of us can take if we will only take the time:
An emergency kit in the family car:
  • Change of clothes/shoes for every family member
  • Water (gallons)
  • Blanket(s)
  • Food (MRE's or even protein bars)
  • Hand sanitizer
  • Wet wipes
  • Personal needs (glasses, contact solution, inhalers, meds, etc.)
  • Cell phone charger
  • Flash light & extra batteries
  • Matches or cigarette lighter
Information to bury or hide securely to prevent theft:
(** indicates need for a hard copy as well)
  • Cash (a few hundred to a thousand dollars in $5's & $10's) Click HERE for 9 ways to make $$$ fast.
  • Flash Drive containing: Account & Phone numbers for Bank, Insurance, Utility & Services** - Contract & payment information** - Address Book** - Medical Information** - Photographs - Email contacts - Computer account(s) passwords
  • Individual photographs of family members w/ descriptions & contact information written on the backs
  • Several days of critical medications
  • Credit Cards not usually on your person

Wednesday, May 11, 2011

Providing Shade for Tender Plants

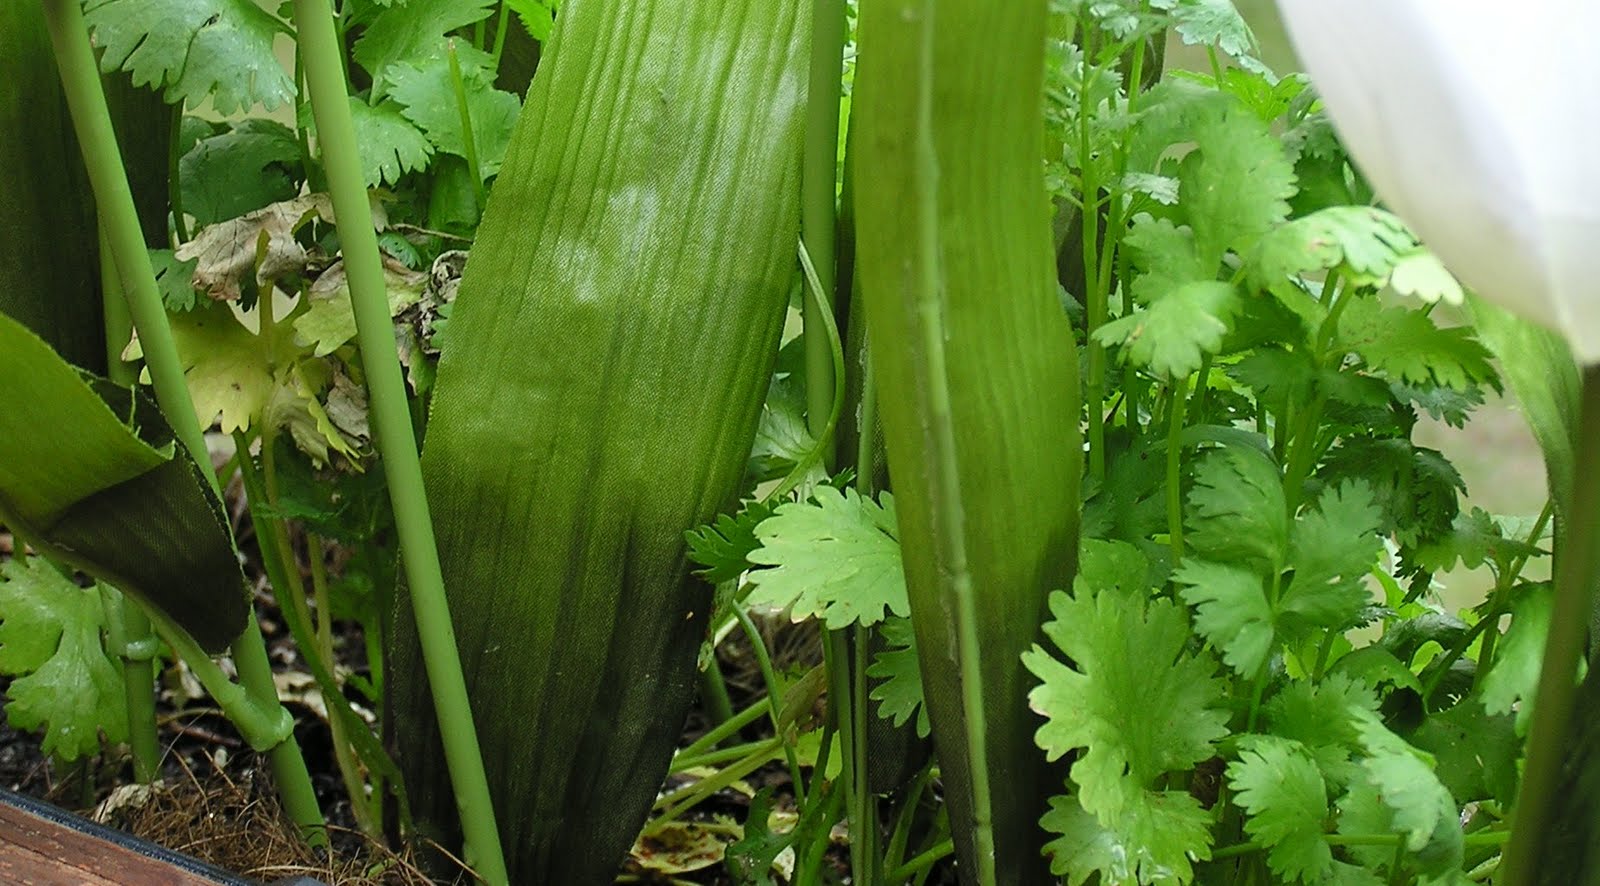
As the morning sun begins to top the trees, some time around 9 AM, the Cilantro along the deck rail stands proud and tall, leaves glistening with the evening dew. By 11, the surface soil is dry and calling me to water, careful not to wet the leaves. The futility of this late morning ritual became evident a few days ago as I became aware of the increasing number of browning leaves, sunburned to a crisp by the heat of the afternoon. Checking the watering needs, I found that the soil completely dry to the bottom of the planters even before the sun went down.
With twice-daily watering already becoming a burden, my mind began to stray to possible sources of shade, preferably something that would filter the sun rather than block it out altogether. From twigs with paper flags to cocktail umbrellas taped to wooden skewers, it seemed my direction got more outlandish with each flitting idea. But the thoughts all had a common theme, something on a stick. Ah-ha! Silk flowers. Remembering the bag of tulips, used as decoration for an event a couple of years ago, I found myself on the deck in the middle of the night planting fake flowers.
Whether this idea was a stroke of genius or not is yet to be determined but, in theory, the approach is a sensible one. The plastic stems should be safe in the soil. The leaves and flowers do provide a measure shade which will vary with the intensity and direction of the sun. And, the stems slip out of the soil for harvesting as easily as they slipped in.
And, other than the fact that it's a little late in the season for tulips, they look nice, almost natural, in the boxes that were rapidly becoming useless in the scorching sun. And the Cilantro is oh so happy.

Monday, May 2, 2011

Garden Mixture of Food & Flowers

Now that I have land enough for a 'proper' garden, age and ability limit my space. Filling pots on the deck with a mixture of flowers and foodstuffs accomplishes the multiple goals of being decorative, functional and thrifty. Here, Basil provides a backdrop for the graceful Blue Salvia, a growing habit shared by the abundant Rosemary. The Rosemary shares space with Parsley and Sweet Red Peppers, in their own pot, will be anchored by the red Dalia. With a later addition of something white, this corner of the deck will be ready for a red, white and blue Fourth of July.
The Cilantro planted from seed in the railing boxes, is ready for use and new seeds will fill spaces left from the season's continuing harvest.

Because I can no longer bend to meet my garden at ground level, I'm working on a couple of plans to literally bring the ground up to meet me. It's a simple matter with unlimited funds but my goal, as always, is to do it with as little cost as possible. I'll keep you informed.

Friday, April 22, 2011

Homemade Mayonnaise - Easy & Great

I'm thankful my car doesn't run on mayonnaise. As the price of gas has almost doubled in the last 10 years, the price of mayonnaise has more than quadrupled. I used to make my own just for fun or to save a trip to the store when I'd run out. Now, making it has become a part of my thrifty kitchen routine. It's not difficult. The taste and texture match or beat the best and most expensive. And, it doesn't contain a single ingredient that I can't pronounce.
MAYONNAISE
(Recipe from my father in 1981)
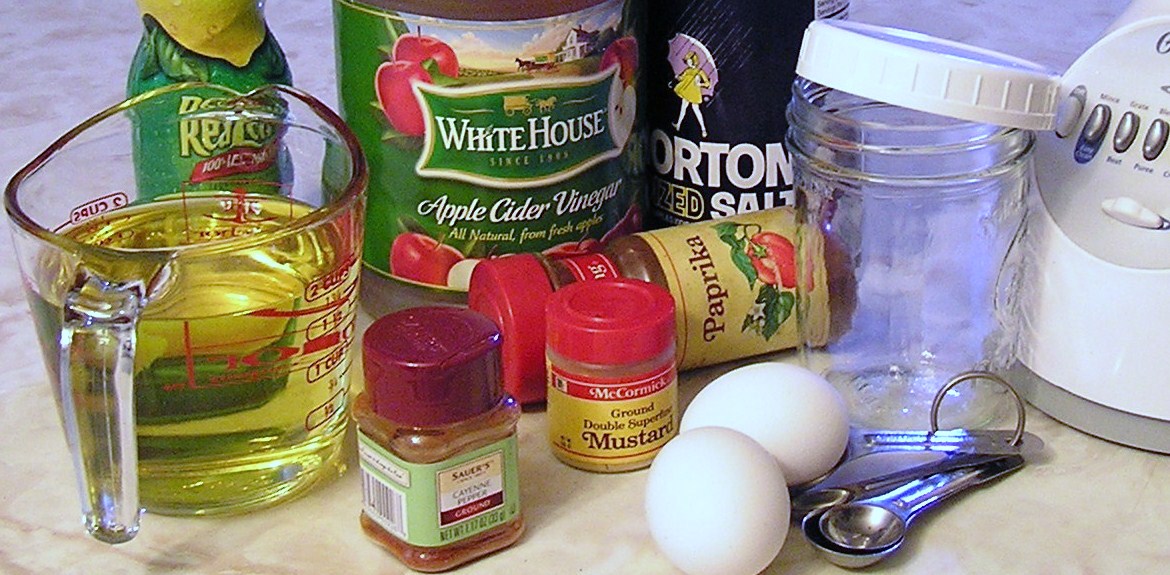
  • Salt - 1 tsp.
  • Dry Mustard - 1/4 tsp.
  • Paprika - 1/4 tsp.
  • Cayenne - dash
  • Whole Eggs - 2
  • Vinegar - 2 Tbsp
  • Salad Oil - 2 cups
  • Lemon Juice - 2 Tbsp
(Mix all dry ingredients first)
Blend in Eggs followed by. Blend well.
FROM HERE, THE MIXING IS IMPORTANT:
Add 2 cups of Salad Oil and 2 Tbsp. Lemon Juice like this:
First, add salad oil, one teaspoon at a time, until 1/4 cup has been added.
Add remaining oil in increasing measurements, slowly (1 1/2 teaspoons, 2 teaspoons, etc.)
Alternate the last 1/2 cup of oil with the lemon juice.

Finally, beat in 1 Tbsp Hot Water.
I use a blender but, toward the end, when the mayonnaise gets really, really thick, I have to stop it a couple of times to scrape down the sides and stir. Transfer to clean jar(s) and refrigerate.
Makes a bit more than a pint (almost 3 cups).

Tweak the recipe for your own variations.
  • Substitute 1/2 to 1 cup of evoo for an equal amount of the salad oil for that olive oil flavor.
Or, try these additions at the end of the mixing process:
  • If you prefer the "salad dressing" flavor over that of mayonnaise (or to sweeten for a perfect Cole Slaw dressing) blend in 3 Tbsp of sweetened Condensed Milk.
  • Add 1 cup of crumbled Blue Cheese for a truly fresh and aromatic salad dressing.
  • Add powdered Ranch Dressing Mix, a little at a time, until your favorite flavor is reached and thin with water to your desired consistency.
  • Add 1 Tbsp each of Sweet Relish and Ketchup plus 1 tsp yellow Mustard for "Sandwich Spread".
IMPORTANT NOTE:
If you are in doubt about the safety of using raw eggs, pasteurized eggs are available, though more costly. Having enjoyed homemade eggnog and homemade mayonnaise since childhood, I never hesitate but you should do your own research. A web search on safety will flood you with cautions and the USDA's "No, no, no's". This LINK contains information that I think is less biased...your choice. But whatever you decide, handle all foods properly and keep mayonnaise (and foods containing mayonnaise) refrigerated. I consider this recipe safe to use for a week or two but it seldom lasts that long.

Tuesday, April 12, 2011

Rethinking the Garden with the Budget in Mind

With the downward spiral of the economy and food and gas prices racing to all time highs, even some of my most thrifty concepts are being fine tuned. One of those is my garden. Usually filled with flowers and crops that I only "hope" won't fail; this year, I'm more serious about the decisions being made. For instance, I've always grown jalapenos even though those locally grown are available at the store for a fraction of the cost. This year, I will buy them instead. The same situation exists with tomatoes. In my area, they require a great deal of care, constant struggle against leaf devouring grasshoppers, careful attention to moisture control and protection from late summer's extreme heat. When I discovered a half bushel at the Farmer's Market for $10, I couldn't justify my efforts, much less my potential failures. I began to consider the things we eat on a regular basis...not only the fresh produce but the canned and frozen vegetables as well. I took a look in my pantry, revisited some old shopping lists and gave thought to our ordinary weekly menus.
  • I cannot grow corn in a pot on the deck.
  • 35 heads of lettuce, all maturing at the same time, cannot be consumed quickly enough or canned or dehydrated or frozen.
  • Dried beans are far too inexpensive to take up valuable (and limited) space in the garden.
  • There is too much clay in my soil for potatoes.
So what are my options? Red Bell Peppers are so expensive at the store these days that I removed them from my shopping lists altogether. However, I can grow them as easily as I've grown Jalapenos in the past. Green Bell Peppers have risen in price a bit but continue to be purchased. They, too, can easily be grown in containers and freeze fairly well. Organic carrots are also pricey but easy to grow. Broccoli, cauliflower and assorted greens grow well here as a fall crop, when overnight temperatures begin to cool. I grew them in Alaska but never even thought of them here. Cilantro is also something I buy regularly. A single packet of seeds will meet my summer needs and the excess can be dried for winter use.

In addition to reconsidering the things I will grow, I've given a great deal of thought to the occasional bargains that come our way. Georgia peaches are sold in season here, at roadside stands and can be bought in bulk and canned for much less than frozen slices or cans at the store. There is absolutely nothing to canning them, freezing them or even putting up spiced peaches for the holidays. When bananas go on sale, they are natural candidates for the dehydrator. And, speaking of dehydrating things, a daughter has had success dehydrating tomatoes and canning them in oil for "sun dried" tomatoes at a fraction of the cost. So, these are the things that accompany my transition into the sunny season. As I put things together, work them out and determine if we are actually able to eat better for less, I will let you know.

Gardening - "First Things" in 2011

After waiting for spring for so long, it seemed a shame that I should fall ill just as it arrived. Even so, it gave me a chance to rethink the extent of the gardening I would do this summer. My conclusion? KEEP IT SIMPLE!
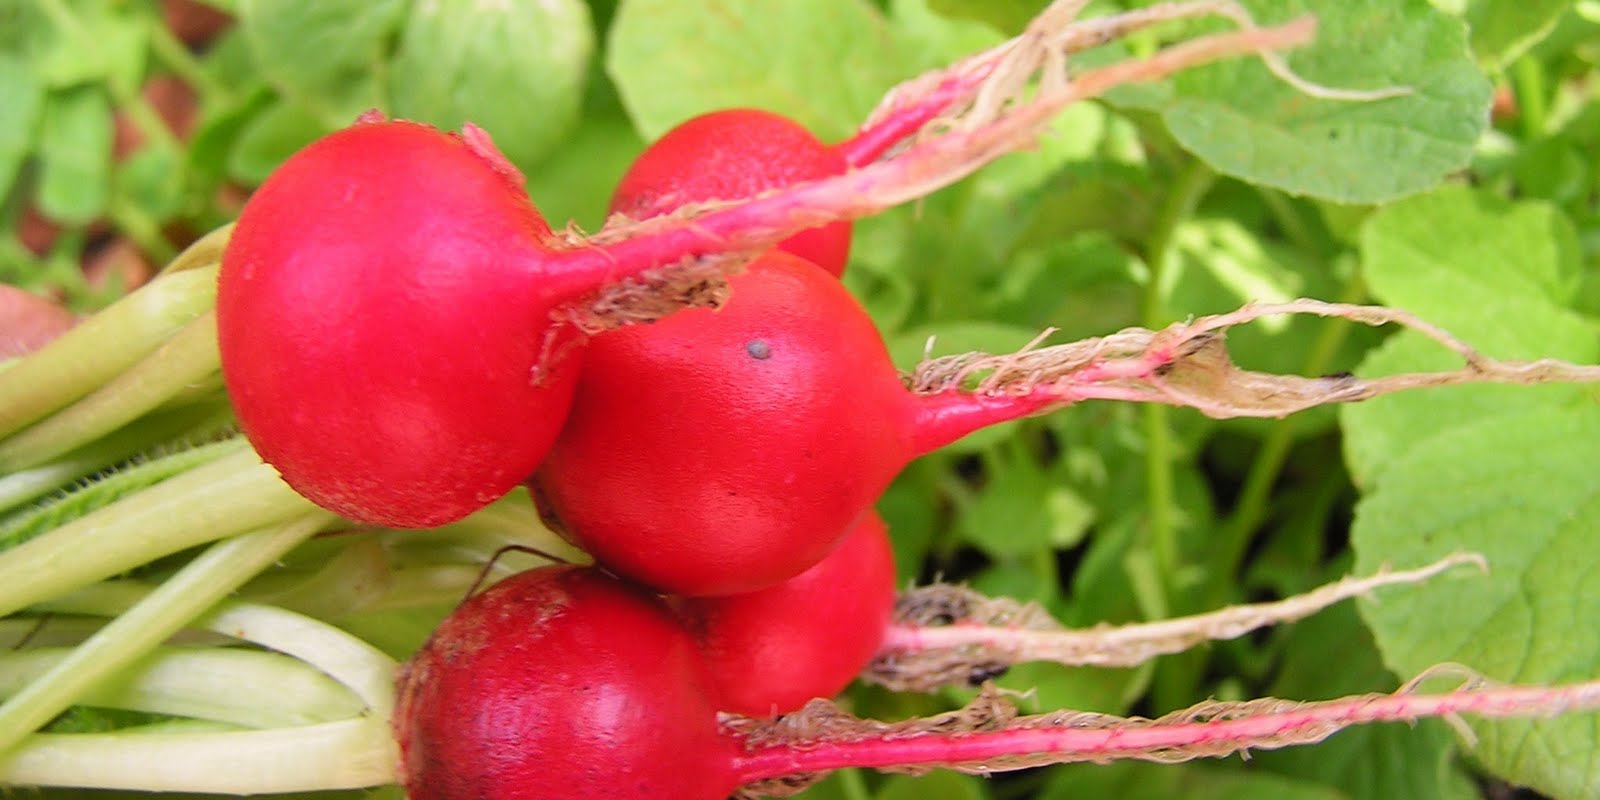
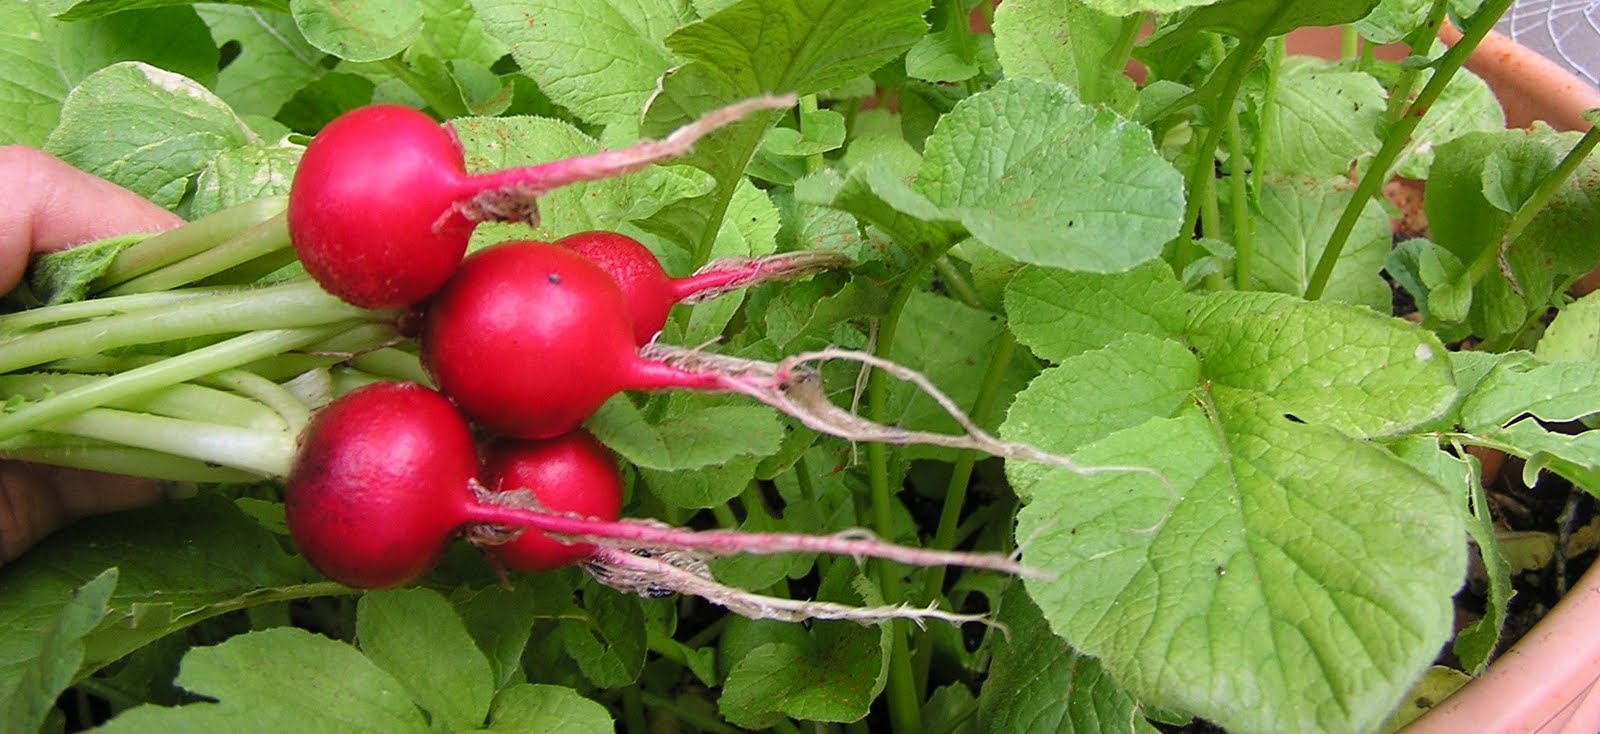
Sometimes, simple is more difficult than one would wish. First, I decided that I would not go to the expense and effort of growing tomatoes this year since I discovered them by the bushel at the Farmer's Market at prices my most frugal growing efforts could not match. That freed up 2 very large containers for other use. After deciding on radishes and carrots, I discovered the need to battle burrowing squirrels for the right to use the space. I won! Link to the battle and conquest HERE.
Now the first radishes are ready for the table and as they are picked, carrot seeds will begin to fill the empty spaces. Judging from the abundance of radishes, and if the carrots do half as well, I'll have plenty of them for canning. That will require the purchase of a pressure canner but will allow me to put up so many more good things over the summer. So look for upcoming posts on canning the caning efforts as well as this season's gardening as I explore new ways to grow more in less space and with less work.

Stewed Tomatoes - Yankee Style vs. Tomatoes in the South

Serving tomatoes as a side dish has fallen strangely out of fashion. I don't know why. As a child, in the deep south, with country gardens producing incredible abundance, tomatoes were served at every meal. Plates of freshly sliced tomatoes were always on the breakfast and dinner tables and a tomato sandwich was standard fare at lunchtime throughout the growing season. I'm not talking a BLT, just two pieces of bread with mayonnaise and a thick slice of dripping tomato inside.

Through the fall and winter, with the gardens tilled and planted with winter crops of collards and turnips and the like, when the canning was finished for the season and the kitchen smelled of fresh baked bread, the flavor and acid punch of the tomato still made its way to the evening table. Canned, as they were in my childhood, with nothing added but water and salt, the tomatoes were emptied into serving bowls and eaten as they were, straight from the jar. The texture was different but the taste was that of the summer.

Canned tomatoes would be left to drain in a colander, chopped and added to salads or the jar of tomatoes, liquid and all, would be added to a pot roast for flavor and to tenderize the meat. Such were the tomatoes of my Alabama mother.

My Pennsylvania father, however, had quite a different view of the lowly fruit. He liked them mushed about and cooked to a frazzle. He thought sugar should be added to cut the acidity. But then, he thought sugar belonged cornbread as well. Either situation was enough to send Mother into a tizzy, ranting about her "Yankee" husband. Since she also referred to herself as a "war bride", I must have been 8 or 9 before I sorted out the chronology of WW II and the war between the states. In my childhood home, it seemed they were concurrent.

Be that as it may, my father liked Stewed Tomatoes. Mother considered them almost a sacrilege. Perhaps it is as a tribute to both of them that in early summer I look forward to my first dripping tomato sandwich and in the cold of winter, cook up a pot of Dad's...

YANKEE STEWED TOMATOES
serves 4 to 6
  • 1 qt. canned Tomatoes - chopped
  • 1 Tbsp Sugar (optional - I don't use it)
  • 1 tsp Baking Soda
  • 2-3 cups bread cubes (white - even old buns will do)
Empty contents of quart jar of tomatoes into a DEEP saucepan. Bring to a boil. Stir in sugar. Add baking soda and be prepared for the tomatoes to erupt into a rising mass of foam. Stir. Remove from heat and stir in bread cubes. Allow to sit for a couple of minutes. Stir again before serving.
A good accompaniment to roasted meats: beef, pork, chicken.

FOR INSTRUCTIONS ON CANNING TOMATOES, CLICK HERE.

Thursday, March 31, 2011

$25 Desk becomes "Shabby Wonderful"

This quite old desk was bought at a yard sale and has kicked around the family for years. Originally mine, I gave it to one daughter when I moved to Alaska. She gave it to another daughter when she changed direction and eventually the desk came back to me when I came back to Florida. Perhaps it was a little worse for the wear, but who could tell. It was dark with age, scratched and dented already. I had tiled the top with 10 cent white wall tiles ages ago to cover the peeling veneer. But it was serviceable and usually confined to a studio or work room.

Eventually, I needed to use it in a more noticeable location and decided to paint it white to go with the tile top. The really outstanding "shabby chic" finish was a complete accident. I forgot to prime the old wood first and it began to bleed unevenly into the white paint as it dried. At first I was downhearted, staring at the need for a much more time consuming job. Then I thought to take some sandpaper to it. The result was classic aging but the crowning touch was realizing that a tin panel piece of my wall art (a $1 yard sale purchase) was the perfect size to provide a privacy panel for the desk. Again, paint on, rub it off, scrub it off, scrape it off. Instant "old". The use of E-6000 glue, and tape to hold the panel in place while it cured, and I was in business. This was one of the easiest furniture projects I've ever done and the result is that an antique dealer recently offered me $300 for it. No sale. It may have started out as a make-do project that went awry but it ended up being one of my favorite pieces.

Monday, March 28, 2011

Springtime Calls for Aprons


Spring makes me smile. Whether this time of year has us looking forward to spring blossoms or spring cleaning or getting a vegetable garden started with thoughts of fresh vegetables on the table or jars of fresh-canned goodness growing in numbers on our pantry shelves, spring seems to bring us home to a simpler time and to our roots. And, what takes us back to simpler times faster than putting on an apron. I remember my mother's Hostess Aprons and my grandmother's kitchen apron. I have an apron for painting and have made my children and grandchildren Crayon aprons. There's something about being 'dressed for the occasion' even if the occasion is getting down on hands and knees and dirty in the soil of a garden. Aprons also make great, unique gifts - tucked in a tote of bar-b-q utensils or a housewarming bucket of cleaning supplies. One of my favorite websites is Amelia's Aprons, featuring handmade creations from the Edwardian style to the little pocketed garden apron I've shown here. Take a look. You just might find something to make you smile, too.

Make Old Candles New Again - FREE

I've struggled with the ugliness of pillar candles for years. Being far too thrifty to throw away so much perfectly usable candle, I've tried cutting away the bulging excess or dropping a votive into the recess...totally unacceptable solutions to the problem. When I saw this old iron at an estate sale last week for $1, I couldn't resist buying it. Notice that it is NOT a steam iron and has a solid sole plate without steam vent holes. "Perfect", I thought and couldn't wait to give it a try.

With the iron set half way between the coolest and hottest settings (between Silk and Wool on this iron) hold it upside down, vertically over a Pyrex measuring cup. Holding the ugly end of the candle to the iron doesn't require pressure. It begins to melt immediately at just the right speed. There is no smoke, nothing to be anxious about, just a steady stream of melted wax sliding off the tip of the iron. It worked like a charm. So easy and so logical.


The end result was four candles as useful as the day they were purchased AND I ended up with 1 1/4 cups of perfectly reusable candle wax which I will feature in an upcoming post.
A couple of things to note are these:
Pinch the brittle, burned part of the wick off before you start. When the wax is melted down far enough to reveal 1/4" of wick, you can stop (as I did) or you can melt it down a bit farther to snip the darkened tip off the wick. Also, since the wax in the measuring cup is already melted, you will be able to pour it immediately into candle molds or just into a different container for storage. I prefer to let it harden, microwave it for a few seconds, to release it from the edges, so I can save it in the shape of the measuring cup that I will use for melting it later. Also, any solids, bits of dust, burned wick pieces or soot, will settle to the bottom of the undisturbed measuring cup and can be scraped away, .once the solid wax is turned out, leaving some pretty nice wax for future use.

I hope you search for an old iron and give this a try. It really was so fast and easy and is a true money saver.

Saturday, March 26, 2011

Keeping Squirrels Out of Plants - UGH!

As day dawns, I am most often found curled in a chair on the porch with a cup of coffee waiting for my world to come to life. It begins softly and slowly, like the movement of the light growing from a dim glow, casting vague shadows across the lawn, to the promise of the rising sun. Out of the silence there comes an occasional chirp of a bird, then a little distant squirrel chatter and as the daylight grows, so do the elements of my morning symphony.
As the owl's ado echoes over the pond and the doves begin to coo under the Wisteria, the squirrels emerge with reckless abandon like kindergarten classes turned out to play. They chatter and squeal and chase each other around tree trunks. They run across the power line to my roof and leap from the roof to the Hickory at the corner of the porch.
Then they set about their business of burying bits of this and that and digging up things they buried before. They scurry and munch and seem to wink at me as they pass. If there were two or 10, I might be tempted to try to tame them, to teach them manners and feed them away from my plants. But I live in Oak and Maple and Hickory filled woods and am overwhelmingly outnumbered. I counted 13 in a single Maple tree one morning with no shortage of others on the ground and in other trees.
You would think that with so much land and so much vegetation that a potted plant on a wooden deck would have little appeal but every carefully tilled and tended square inch of soil seems to beckon them to assist in the gardening. They had no appreciation at all for my tidy rows of radishes sowed in last years big tomato pots. Before I could share the precision of seed by seed planted rows, the squirrels had completely rearranged them in the most disorderly fashion. I almost cried but opted for a hardware-cloth cover instead. Now that the radish plants have leaves enough to cover the soil, I will remove the wire soon.
The window boxes along the deck railing, which held last spring's lettuces, is planted with Cilantro this year. What a mess they made of those. So, on went coverings of hardware cloth and I think I will try to leave it in place if it looks like the stems of the Cilantro will grow through the spaces. Hardware cloth is available with wider spaces but this is what I had on hand (a $1 purchase at a yard sale. I knew it would come in handy some day).
The hardware cloth seems to be a good solution for the herb and vegetable starts but would sort of defeat the purpose of flowers, don't you think? So, I tried hot pepper flakes. Don't bother. They didn't help at all and I might even find peppers growing among my posies as a result. But CAYENNE PEPPER certainly seems to be doing the trick, so much so that today I bought a jar with a shaker lid just for use outdoors.
But it rained today and I'm curious to see if a week of Cayenne Pepper has been enough to deter the rowdy rodents for a while or if I will need to rush outdoors, shaker in hand, each time the rain subsides. I'll let you know. In the meantime, I'm thoroughly enjoying blooming Azaleas and Dogwood trees, squirrels and all, and the emergence of spring bulbs like these African Lilies and am looking forward to the abundance of color and the edibles that summer will bring.
And I look forward to seeing my furry little rodent friends over coffee in the morning.
UPDATE: The Cayenne Pepper is working like magic even 3 days after a rain without reapplying. But I did sprinkle a little more on today. Give it a try.

Wednesday, March 23, 2011

Brick Path Destination

A TREE GOT IN THE WAY! With the little brick path detour neatly heading in the direction of my future studio and the studio yard somewhat defined, we set about establishing corners and laying blocks in anticipation of a building project in the not too distant future...my long awaited, little, garden studio.

That's about the time we noticed the long split in the trunk of a seemingly thriving but lightning-struck tree that was leaning precariously over my would-be roof. I thought the tree would be fine since it held a full display of new spring leaves. Fortunately I was overruled.

My husband had hardly begun to cut when, in an instant, the tree snapped and hit the ground. How there was life left in that tree, I will never know because, as you can see, it was hollow to the root...an accident waiting for a wind.
So, the tree was felled and firewood cut and in a week or so construction will begin. But the 12' x 16' studio is unlikely to be finished any time soon. I'm committed to building it with savings gleaned from bargains, spare change and a great deal of faith.

My hope is that it will look something like this but already I have lost access to the leaded window in the gable. Bummer. But I'm sure something equally appealing will turn up.
In the meantime, I have a date with this little guy and about 30 of his closest friends. I love watching them and they love digging in my garden and flower pots. I can tell you now that pepper flakes are no deterrent and will have an opinion on Cayenne Pepper by morning.
YEP! THE CAYENNE PEPPER WORKS LIKE A CHARM.

Tuesday, March 22, 2011

Brick Path Extention

The brick and gravel garden path just about exhausted my supply of materials. Wanting to branch off the path to a specific destination left me in a bit of a quandary. I had already mixed two materials and felt that I needed some level of consistency before breaking into the flagstone path that I envisioned for my personal space.
Scavenging every available brick from my little brick wall and flowerbed borders and any place else that they might be hiding, I managed to round up enough to make a smooth transition.Abandoning the use of gravel for a short space, and using only the brick, continues the original look to a logical point of departure. From the closing of the gate, the path will continue with flagstone.
To construct the path extension, first, I laid the bricks in a pattern that suited me. The outside, border pattern is called a "soldier course" and the staggered interior pattern is called a "running bond". I have no clue why I know that. Then I marked the outline by cutting into the soil with a shovel, removed the bricks and dug the dirt away to make a level bed the proper depth. After replacing the bricks directly on the soil, I mixed brick mortar and filled the major gaps to help hold them in place. The bricks along the outer edges were secured with a mortar filled trench. I realize that without setting the bricks in a complete bed of mortar, they are likely to settle, become a bit uneven and encourage an occasional weed to to take root in the gaps. Great. That's exactly the rustic, aged look I want and if the flaws become too severe, it's a small task to reset a single brick or two.
To access the "how-to" post about building the brick and gravel path, click HERE.