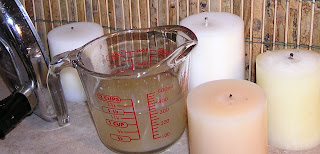
 I've struggled with the ugliness of pillar candles for years. Being far too thrifty to throw away so much perfectly usable candle, I've tried cutting away the bulging excess or dropping a votive into the recess...totally unacceptable solutions to the problem. When I saw this old iron at an estate sale last week for $1, I couldn't resist buying it. Notice that it is NOT a steam iron and has a solid sole plate without steam vent holes. "Perfect", I thought and couldn't wait to give it a try.
With the iron set half way between the coolest and hottest settings (between Silk and Wool on this iron) hold it upside down, vertically over a Pyrex measuring cup. Holding the ugly end of the candle to the iron doesn't require pressure. It begins to melt immediately at just the right speed. There is no smoke, nothing to be anxious about, just a steady stream of melted wax sliding off the tip of the iron. It worked like a charm. So easy and so logical.
The end result was four candles as useful as the day they were purchased AND I ended up with 1 1/4 cups of perfectly reusable candle wax which I will feature in an upcoming post.
 A couple of things to note are these:
Pinch the brittle, burned part of the wick off before you start. When the wax is melted down far enough to reveal 1/4" of wick, you can stop (as I did) or you can melt it down a bit farther to snip the darkened tip off the wick. Also, since the wax in the measuring cup is already melted, you will be able to pour it immediately into candle molds or just into a different container for storage. I prefer to let it harden, microwave it for a few seconds, to release it from the edges, so I can save it in the shape of the measuring cup that I will use for melting it later. Also, any solids, bits of dust, burned wick pieces or soot, will settle to the bottom of the undisturbed measuring cup and can be scraped away, .once the solid wax is turned out, leaving some pretty nice wax for future use.
I hope you search for an old iron and give this a try. It really was so fast and easy and is a true money saver.


No comments:
Post a Comment