
Never buy candles again. With spring approaching, our thoughts turn to reclaiming our yard, planning a garden and the hurricane season. Normally I stock a supply of candles and wince at the cost, wishing I had more oil lamps. I don't know why but I suddenly remembered that my mother used to make them in mason jars. So, I thought I'd do some experimenting and go for "pretty" while I was at it.
 With spring approaching, our thoughts turn to reclaiming our yard, planning a garden and the hurricane season. Normally I stock a supply of candles and wince at the cost, wishing I had more oil lamps. I don't know why but I suddenly remembered that my mother used to make them in mason jars. So, I thought I'd do some experimenting and go for "pretty" while I was at it.
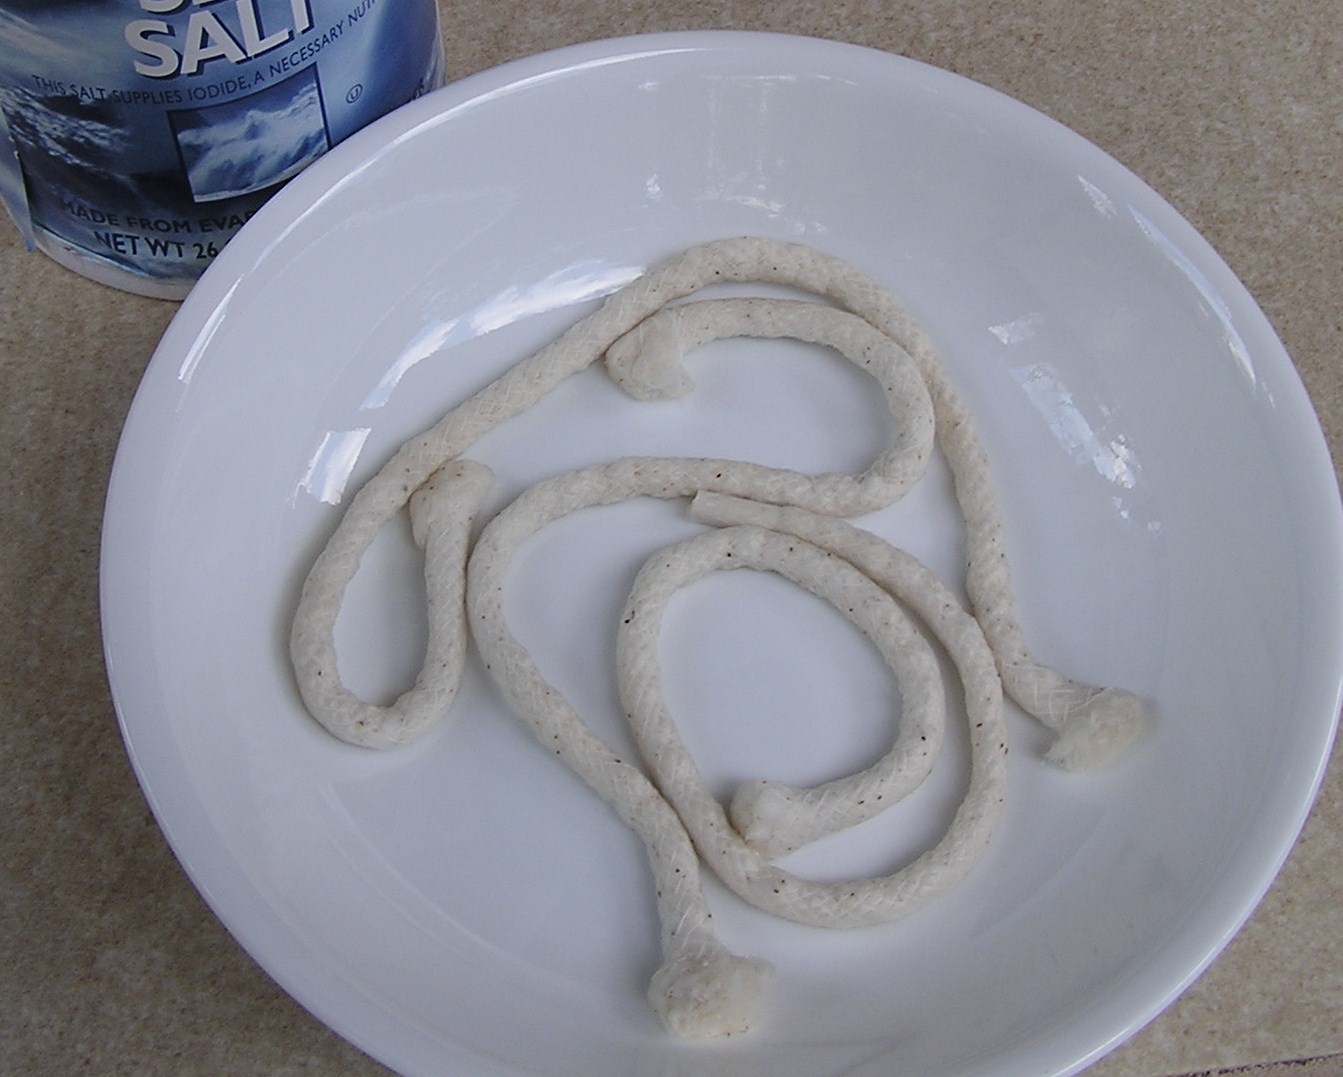

1- Use 100% cotton wick material...a strip of cotton fabric or twine will do. I used cotton "filler cord" from the fabric department, 10 yards for $2.29. That's a lot of wick! 2- cut your pieces (6" to 12" long) and soak them in water. Shake off the excess and cover them with salt for several hours so they will burn slower and longer. Remove the salt and let the wicks dry.


3- Select your containers. I chose a candle glass, a sea shell and a little vase I made years ago. 4- You will need wire to stabilize the wick. I used 18 gauge "bright" floral stem wire, 18" long.
5- The purpose of the wire is to hold the wick either up from the bottom of the container or down from the top. So, fashion it accordingly. One thing I learned is that the only part of the wick you want exposed to the air is the 1/4" above the wire that you will light. You will see that I made a small metal sleeve to surround the wick in the little vase. I should have done that with the sea shell and I did coil extra wire around the descending wick in the glass.
5- The purpose of the wire is to hold the wick either up from the bottom of the container or down from the top. So, fashion it accordingly. One thing I learned is that the only part of the wick you want exposed to the air is the 1/4" above the wire that you will light. You will see that I made a small metal sleeve to surround the wick in the little vase. I should have done that with the sea shell and I did coil extra wire around the descending wick in the glass.


6- Test the positioning of your wires in the containers and when you are satisfied, thread the wick through and crimp the wire snugly around the wick. You want it to to be tight but still allow you to pull the wick up once it has burned down.
 Use only olive oil as it will not smoke, doesn't smell and, amazingly, it will not burn. You cannot set it on fire - go figure! In fact, if you have fashioned your wire to hang from the rim of your container, you can simply dunk the flame into the oil to put it out. I would suggest covering the lamps with plastic wrap and a rubber band when not in use to keep the oil from evaporating. I'm going to try infusing lavender in some of my oil to see if I will get that wonderful fragrance.
Also, I found this site (LINK) that gives instruction for making the type of clay oil lamps used by the ancients. You might enjoy it. I'm going to give it a try.
I have a party to plan for the weekend and will post the highlights.


+-+Copy.JPG)