Wednesday, September 18, 2013

Ah, Lovely Fall!

 How nice it is to feel the breeze through open windows again, to see sun shadows crawling down from the ceilings and painting leaf patterns low on the walls.  
Soon the grass will be cut for the last time and the lawn will be littered with leaves.
Something in me begins to relax and something else agitates with anticipation.  Warm colors and thoughts of comfort food lessen the drudgery of packing away summer toys and preparing to turn indoors for a season.
(1) PERFECT WHITE BEAN SOUP
This year, unlike others, I look forward to saying goodbye, at least for a while, to minor medical problems that seem to have taken the luster from the past several months.  Tomorrow, if all goes well, and I'm sure it will, I'll begin my journey back to the enjoyment of life.  
(2) QUICK PUMPKIN SPICE DESSERT
My intention is to flood the blog with warmth and wonderment through the coming holidays.  In the meantime, I'm bringing back some original postings for those who might have missed them in years past.  Enjoy.  Wish me luck.  And plan your own autumn regeneration.
(3) HOT RUSSIAN TEA


1-  Perfect White Bean Soup
1 lb. Dry White Beans (cover with water and soak overnight)
1 Ham Bone
3 Onions - coarsely chopped
1/2 bunch of Celery - finely chopped, include leafy tops
1 Tbsp Garlic - minced
1-2 c. Instant Mashed Potatoes
Salt & Pepper - to taste
 

Rinse beans that have soaked overnight. In a large pot, bring beans, ham bone, onions, celery, garlic and 3 quarts of water to a rolling boil. reduce heat and simmer for 3 hours. Remove ham bone and cube the meat. Add the cubed ham back to the pot with enough of the instant mashed potatoes to bring the soup to the consistency (thickness) you would like.

2-  Quick Pumpkin Spice Dessert

Fold together a prepared box of Jell-O Pumpkin Spice Pudding with a container of whipped Topping.  Do not mix too thoroughly so that it maintains a “marbled” appearance. Quickly dip Ginger Snaps, one at a time, in milk and alternate layers with pudding mixture in 9” x 13” dish.  Begin with cookies and end with the pudding mixture.  Chill and serve.

3-  Hot Russian Tea

3 cups Sugar
19 oz. container of Lemonade Mix
20 oz. jar of Tang
3 oz. jar or unsweetened Instant Tea
2 Tbsp ground Cinnamon
1 tsp each of ground Cloves and Ginger
Mix all ingredients together in a very large bowl. Transfer to a suitable, airtight container.  Use 1 or 2 heaping spoonfuls per cup of hot water. Inhale, sip and enjoy.

Saturday, May 18, 2013

It's TOMATO Time Again - Gardening & Canning

These poor little tomato plants sat indoors on my desk for 5 weeks waiting for the weather to make up its mind so I guess it's no wonder that they took off the instant I set them free.  Here's a LINK to the best general growing information that I've found - including what NOT to do.
Here are some links for additional growing tips like using ASPIRIN or planting tomatoes with EGGSHELLS.
I generally start with a fairly well blended soil and add EPSOM SALTS from time to time to help prevent blossom end rot.  So far, as long as the weather has cooperated, I've had very good luck.
I'm hoping for a bumper crop this year so I can get some additional canning done.  I've been far too stingy with my home canned tomatoes from the past couple of seasons.  This year, I intend to re-process the tomatoes from those jars, turning the previously canned tomatoes into tomato sauce or ketchup or something else...haven't quite decided on that yet.  
 In the meantime, here is a LINK to easy, step-by-step tomato canning instructions.

Friday, March 22, 2013

Day 125 - Sourdough Success in a Jiffy

My first loaves of Sourdough Bread with the new Starter turned out perfectly, just as the ones made for years in Alaska.  But I've past the age or enjoying endless time in the kitchen and have dedicated myself, instead, to figuring as many ways as possible to get out of there as quickly as I can.
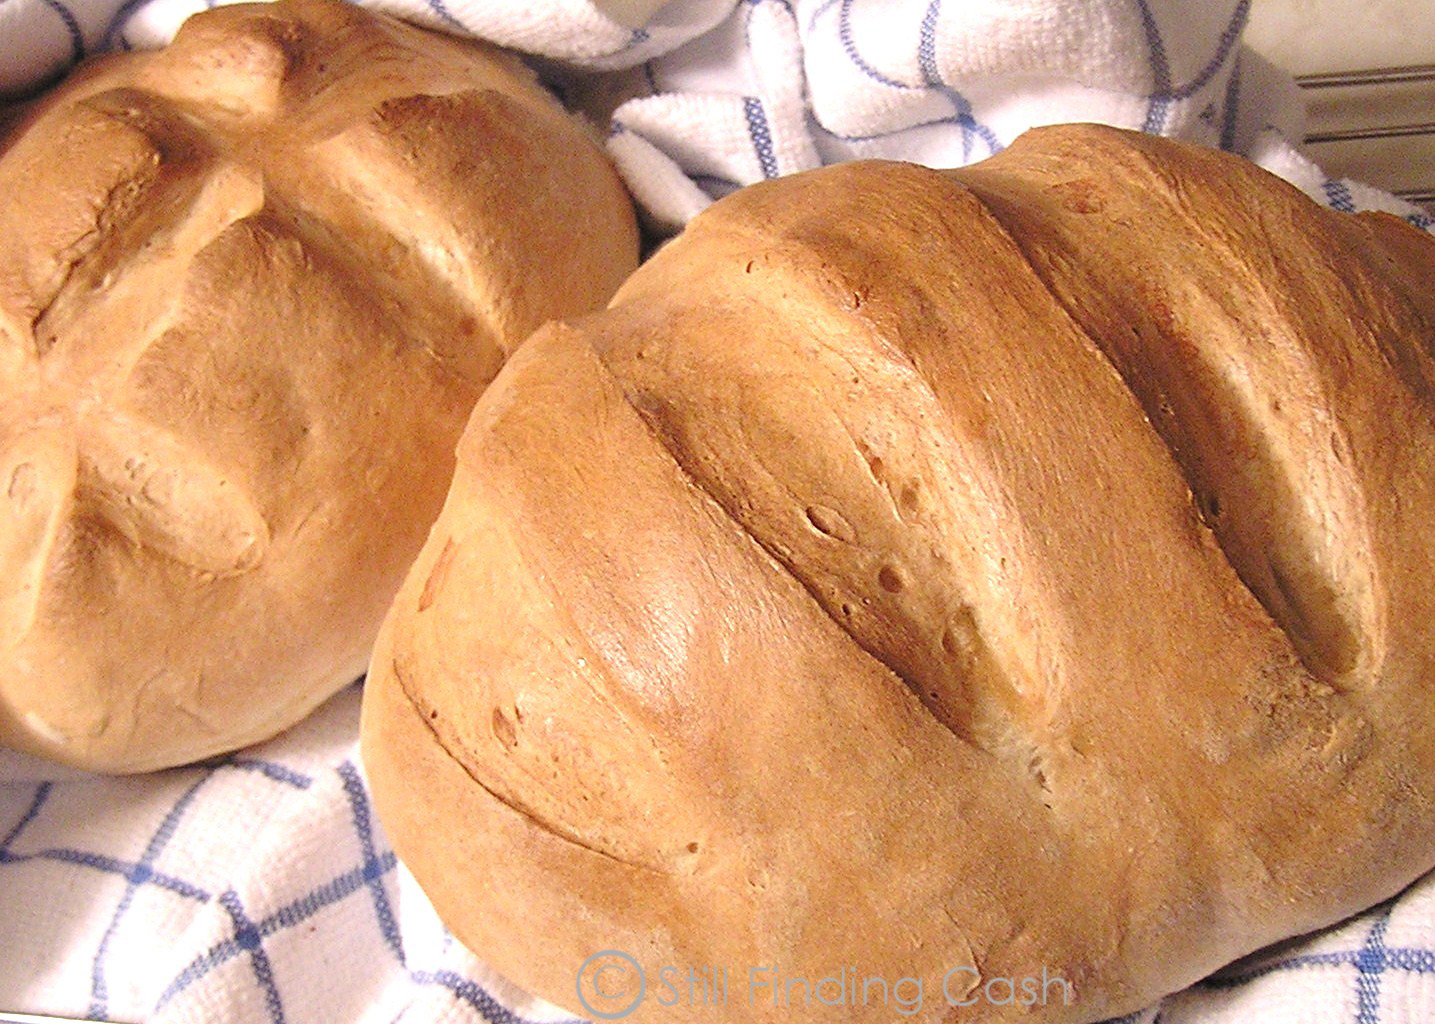
Perfect Texture (but cutting should wait until cool)
To that end, I've adjusted my favorite Rustic Bread recipe to accommodate the sourdough.  This is the result and I couldn't be more pleased.  The aroma is incredible, the texture perfect and the best part is that there was no "punching down", no kneading, no second rising; in fact, my kitchen time was reduced to about 5 minutes - the night before and again the morning after.
RUSTIC SOURDOUGH BREAD
(Link for making sourdough 'starter' and sourdough 'batter')
Into a very large glass or plastic container, (pre-warmed with HOT water)...
2 cups Warm Water, 1 pkg Dry Yeast (= 2 Tbsp) and 1 Tbsp Sugar.  
Wait 2 minutes for yeast to "bloom".  
Stir in 1 heaping Tbsp Salt and 1 1/2 cups Sourdough "BATTER".  ADD 6 cups All Purpose Unbleached Flour ALL AT ONCE.
After mixing, this rose almost to the top before beginning to collapse.  Photo shows "morning after" and ready for making loaves.
MIX WELL - Use your hands, if needed, to incorporate dry with wet.
COVER - Use loose fitting lid or plate so dough can "breathe".
LET STAND - At room temperature for 2 to 5 hours until dough has risen and begins to collapse.
REFRIGERATE - Overnight or at least 3 hours.
Cornmeal on baking sheet.
PREP FOR BAKING - DO NOT KNEAD!!!
1-  Liberally sprinkle Corn Meal over baking stone, iron skillet or baking sheet.
2-  Turn refrigerated dough onto floured surface.  Divide in half using serrated knife.
3-  With floured hands, form each half into a ball and "cloak" the dough (Cloaking is gently stretching the top surface of the dough around to the bottom, tucking it under and turning it 1/4 turn as you go.  The correctly shaped final product should be smooth and cohesive.  This process should take only 30 to 60 seconds.)
NEXT:  Set the shaped loaves on the cornmeal-prepared surface and let "rest" for 40 minutes.  
Place empty broiler pan on the oven rack just below the center rack and preheat to oven to 450 degrees.
When loaves have rested and risen, dust the surfaces lightly with flour and slash 1/4" deep with a serrated knife.  
Loaves set to rise for 40 minutes.
Move loaves to center rack of oven and add 10-12 oz. of water to heated broiler pan.  Close door immediately to trap steam.  Bake 30 minutes.  Cool on wire rack.
TIP
To easily gather excess flour from surface, use a paper plate - cut in half.

Thursday, March 14, 2013

Simple Stuffed Mushrooms

I've always said I'd rather have the appetizer than the meal.
Today, I couldn't think of a single thing that sounded good for lunch.  Sandwiches seemed too heavy with the bread and I'd overdone on soup during the past couple weeks.  A salad sounded healthy and even met some of my flavor needs but it's cold outside and a cold salad just didn't hit the mark.  But when I thought of salad ingredients and remembered I had fresh mushrooms, something clicked.
These are the ingredients I gathered for my hot stuffed mushrooms:  10 Mushrooms, 10 Crackers, 3 Tbsp Parmesan Cheese, 2 Tbsp Mayonnaise.  At the last minute, I tossed in a good sprinkling of Parsley.

Mince the Mushroom Stems and mix everything together.  Stuff.  Pile on top and bake at 300 degrees for 15 minutes.  Warm and satisfying.  Add a can of tiny shrimp or some precooked sausage and increase the quantity and having appetizers for a crowd is just as easy.

Tuesday, March 5, 2013

Garlic Shrimp & Sugar Snap Peas in 5 Minutes

Today we discovered that someone had stolen our little "pond" boat and dealing with photographs and the Sheriff ran me right past dinnertime.  Fortunately my freezer generally holds things that are quick to fix.  
Tonight I put some frozen shrimp in a bowl of water to thaw while I thawed 2 frozen servings of rice in the microwave and buttered some French bread for the broiler.  Putting it all together is so simple.  Butter in a skillet with some garlic.  When it's good and hot, the drained, and patted dry shrimp was added.  I put the thawed rice in a bowl with some chopped green onions (also frozen) and put the bowl, covered, in the microwave for 1 minute.  Added 1/2 cup white wine to the shrimp skillet and when it began to boil, removed the shrimp and left the wine, butter and garlic mixture to reduce.  Toasted the bread.  Served the rice.  Added a couple handfuls of sugar snap peas to the reduction and returned the shrimp to the skillet just before serving.  5 minutes - beginning to end and it was delicious!

Monday, March 4, 2013

Scratch Biscuits without the Bother

If you're like me and dread the task of homemade biscuits because of cutting-in the shortening and flour, try this.  
BISCUITS WITH HEAVY CREAM
With a fork, mix together: 3 1/2 cups Flour, 1 tsp Salt, and 2 Tbsp Baking Powder.  Add 1 1/2 cups Heavy Cream and mix together until just moistened.  Turn out on lightly floured surface and knead 10 times.  Roll to 3/4" thick.  Cut into biscuits and place on ungreased baking sheet.  Bake in 450 degree oven for 12 minutes or until golden.  
It's almost as easy as opening a package.
With raw, wild honey, yummy!

Sunday, March 3, 2013

Warm, Sticky Cinnamon Buns - Yum

...or not.  Not all of my endeavors are successful.  This was one of them.
Remembering the huge, light cinnamon buns that I used to crank out almost every morning when we lived 10,500 feet up a Colorado mountain might have triggered my impulse to get creative with the new Sour Dough starter resting in the refrigerator but sea level adjustments never crossed my mind.
These buns look delicious and they they do taste great but the dough is dense and chewy and a huge disappointment.  Still, the technique is quite simple and worth passing along. 
With a 'proper' (sea level appropriate) dough, sufficiently risen, the rest is easy.  
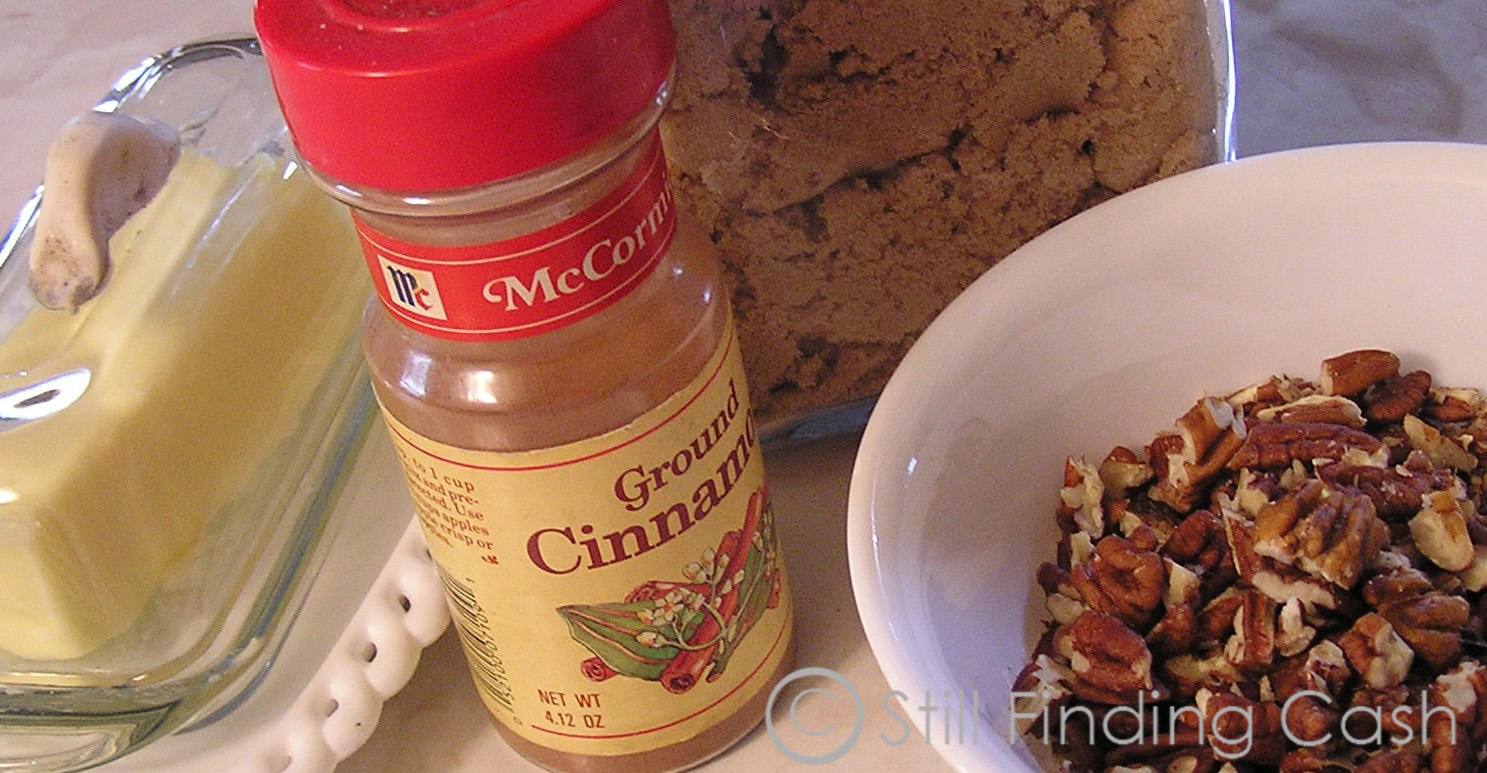
Just 4 ingredients and that we probably have on hand.
Roll the dough into a rectangle about 8" or 9" wide, and as long as you are able, to a thickness of 1/2".  Spread the surface liberally with softened, room temperature butter.  Top the butter with a substantial layer of Brown Sugar.  Sprinkle the sugar with Ground Cinnamon.  Add a liberal sprinkling of chopped Pecans or Walnuts.
With all of these things piling up on the dough, be sure to leave an inch or so without butter or toppings, at one long edge.
Carefully lift and roll and tuck, beginning at the long edge that does have the toppings.  When the roll reaches the long edge that has been left bare, pinch the edge onto the dough roll to seal it.
Cut the roll into separate buns of about 1 1/2" thickness using scissors.  Place rolls about an inch apart in a pan that has been prepared with 1/4 stick melted butter in the bottom and sprinkled lightly with brown sugar.  Cover with a dish cloth and allow dough to rise until double or about 1 1/2 hours.
Risen and ready to bake.
Bake in a 400 degree oven for 12 to 15 minutes or until sugar is bubbly and dough is slightly browned.
When done, remove from oven and immediately and turn upside down to release the buns.  Do NOT cool in pan.   The sugar and butter in the bottom of the pan will have caramelized and make the most wonderful, gooey topping for the upside-down buns.
Homemade cinnamon buns top anything a store has to offer so I hope you'll find a dough recipe that works for you and give it a try.  Sourdough is not necessary.  I just liked the thought but need to work on the recipe.

Wednesday, February 27, 2013

Sourdough

Shortly after arriving in Alaska. a friend gave me a bit of Sourdough Starter that had been kept active since the late 1800's and I baked bread with it all the time including on camping trips.  Unfortunately, my starter didn't survive the move to Florida. 
Last week, in a moment of serious nostalgia, I mixed up a 'Starter' recipe I found in a 1959 Farm Journal cookbook:
SOURDOUGH STARTER
In a stone crock, glass or pottery bowl, mix together  1/2 pkg Dry Yeast (1 1/4 tsp),  2 cups sifted Flour, 2 Tbsp Sugar, and 2 1/2 cups Water.  Beat well.  Cover with cheesecloth and let stand 2 days in a warm place.
After just a couple of hours, the volume began to increase.
Above is my well-worn, personal page of Starter Handling instructions that I kept with my bread making things in Alaska.
It is the Sourdough Starter that gives the rich flavor to the bread.  This new starter of mine doesn't have quite the heft that the old Alaska starter did but I'm hoping that it will develop more over time.  Once there is starter in the kitchen, there is no end to the possibilities.  Recipes are all over the internet.  Today, I'm making Sourdough Cinnamon Rolls. 

Thursday, February 14, 2013

Homemade Crackers - Quick n' Easy

Well, it's day 69 and I'm behind on the blog again.  I haven't been able to do much because my back is not happy with me standing so I thought I'd share a very old Southern Cracker Recipe that takes no time at all to prepare.
I made my crackers small, about 2" x 2" and they shrank a little more as they dried.  But they are delicious with either sweet or savory toppings.  You should have all ingredients on hand so give it at try.  I think you'll be glad you did.  Here you go:
Sift together:  1 cup All-Purpose Flour, 1 tsp. Baking Powder and 1/4 tsp. Salt.
Cut in 1/4 cup (1/2 stick) Butter to the texture of coarse meal.
Add 1/4 cup Milk, all at once and stir until dough forms a ball.
Turn out on lightly floured surface and knead gently, 8 to 10 times.  Roll to 1/4" thickness and cut with standard biscuit cutter. (I used my pizza cutter to make square crackers because my biscuit cutter is very large.) Place on greased cookie sheet.  Bake at 400 degrees for 10 minutes.  Remove from oven and split the hot crackers in half with a sharp knife.  Return to oven, cut sides up, and bake another 4 to 6 minutes.
I turned my oven off, opened the door and let the sheet of crackers remain in the cooling oven to dry out thoroughly.  The taste and texture is much like that of Sailor Boy Pilot Bread, Alaska's favorite cracker and if I had made them large and round they would even look similar. They are great.  I'm getting ready to eat a bunch with cream Cheese and Pepper Jelly.  Sorry I didn't think of that in time to get a photo.

Thursday, February 7, 2013

Over-the-Top Chicken Salad

Chicken Salad, can be more than a mush spread for sandwiches and it doesn't take a chef to move it to dinner fare. 
Avocado stuffed with Chicken, Walnut, Apple Salad
The key is to use nice cubes of chicken and mix them with things that go crunch and with a bit of something sweet and something unexpected.  Usually I stuff a tomato but this time I piled it high on an avocado half and sprinkled grape tomatoes over the top.
Cubes of Granny Smith Apples add moisture and just a touch of sweetness.  Here's my list of ingredients but they aren't 'must haves'.  Just toss in things you like and be generous.

INGREDIENTS
1 cooked, cubed and salted Chicken Breast
2 coarsely chopped Hard Boiled Eggs
2 slices of Sweet Onion, minced
Toss with 2 Tbsp. Mayonaise
Add:
1 Granny Smith Apple, which has been diced and drenched with the...
Juice of 1/2 lime. (save enough apple for thin-slices garnish)
1 cup Walnut Halves, broken
Mix all and toss together

Greens (any kind will do)
1 Avocado, quartered & drizzled with lime juice
Grape Tomatoes, halved
Snow Pea Pods (just because I had them)

On a bed of greens and snow peas, place 2 avocado quarters.  Pile on Chicken Salad.  Sprinkle with tomato halves.  Squeeze remaining lime juice over all.  Garnish with thin apple slices.  Serve with toasted French or garlic bread.