Thursday, May 22, 2014

Cooler Corn - Hot Idea

GREAT IDEA FOR MEMORIAL DAY COOK-OUT 
I see ideas like this one on the internet all the time.  Some of them don't work.  
This one did and I was so surprised at how well it worked that I will never kitchen-cook corn on the cob for a crowd again...and you won't want to either. 

No more heating the kitchen and timing the boiling corn so that it will be done but not overcooked and tough.  Here's how it works: 
  • Preheat a clean cooler by rinsing with hot tap water.  
  • Place shucked corn inside.  
  • Pour a pot of boiling water over the corn.  (I used my spaghetti cooking pot)  
  • Close the lid and set the cooler aside. That's it!
While you are busy preparing the rest of the meal or putting burgers on the grill or driving to a picnic, the corn is taking care of itself.  Mine stayed in the cooler for 30 to 45 minutes.  I don't think the exact time matters a bit.  As we were serving plates, everyone got a kick out of serving their corn directly from the cooler.   It was tender, sweet and PERFECT.  

Give it a try and let me know if you are as pleased with the results as I was.  Enjoy!

Tuesday, May 20, 2014

Canning - Cia's Oil-Roasted Garlic Jalapenos with Warning!

This recipe and method was concocted by me the summer that I planted 24 feet of jalapeno plants. Ha! One of my first gardening adventures. I had no idea what a jalapeno plant would look like or how many peppers a single plant would produce. Needless to say, I had to get creative. This experiment turned out to be my greatest pepper success. The flavor is incredible and goes such a long way that a tsp. will flavor an entire pot of chili, a spoon dipped into the oil and used to stir salsa or Pico De Gallo will add all the heat and flavor needed and a drop smeared across a cooked hamburger patty will transport you to flavor and heat heaven.

Now, this is not a process that I would recommend to the faint-hearted. In fact, I wouldn't even post it except that it's one of my kids favorite things and I don't want their supply to dry up and wither away just because I do...at some point in the distant future, if you know what I mean. So, here goes...but be warned:
  1. Do not attempt this without wearing gloves as your hands will burn for 2 days and any body part you touch will hate you for hours.
  2. Do not use the water sprayer on your sink as the heat molecules will atomize, you will inhale them and start coughing so hard you will wet your pants.
  3. Don't use the disposal for the same reason.
  4. Do not use your exhaust vent while cooking unless it vents to the outside; if it recurculates, you will get a face full of pain that you won't forget for a very long time.
  5. Do not lean over pan while cooking, in fact, use a l-o-n-g handled spoon to stir and lean as far back as possible.
And, if these warnings are not enough to deter you, consider this...there are conflicting opinions concerning the safety of peppers canned in oil. Do NOT take my word for the health safety of my method. Check other sources and your extension office for additional information. Having said that...I've been making these for 25 years and serving them to my family with confidence. I have never had the seal on a jar fail or the contents spoil.
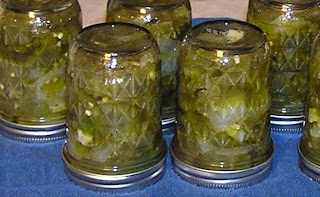
So here goes. As usual, start with sterilized jars, lids and rings waiting patiently submerged in simmering water. This recipe makes 6, 8oz. jars.
  • 2 1/2 lbs Jalapenos
  • 2 Onions - chopped in large pieces
  • 1 entire head Garlic - cloves separated, peeled and cut in half
  • 2 ozs. Vegetable Oil
  • 1 c. Olive Oil
  • Non-iodized Canning/Pickling Salt - to be used liberally
  • 3/4 c. White Vinegar - 5% acidity
Wash peppers. Cut stem end off or leave on, your call. Cut about 1/4 of the peppers in 1" pieces, leaving seeds in. With the remaining 3/4's, cut lengthwise, remove seeds and veins and cut in 1" pieces. Prep the onions and garlic. Put the oils in a large skillet and heat on medium-high. When oil is hot, add the peppers only. When peppers begin to "wilt", add garlic and onion. Stir and salt surface liberally. Continue to stir and toss until onions begin to turn translucent. Add vinegar and return to boil. reduce heat and work quickly. Using a caning funnel, spoon hot mixture directly from hot skillet into one hot jar at a time. Wipe jar rim and threads with a clean, damp cloth and add lid and ring. Screw ring tight and invert jar on folded towel. Continue, one jar at a time until done. when cool, wash jars leaving rings on for storage.

NOTE: If there are any "bits" or liquid left in the pan after all jars are filled, save in the refrigerator for tasting when cool. (Tiny taste) yummy!

Thursday, May 15, 2014

DIY Outdoor Time Saver

How many times I've walked into the front yard and noticed some little something that needed to be tended...something to be pulled or trimmed or fertilized and I let it go.  Almost always, the reason was the same; I only had a minute and whatever I needed to accomplish the task was un-handily kept in some distant location like the garden shed or the garage.

 My husband solved the problem by building this little front yard storage box.  No more complicated to build than a birdhouse, it keeps everything close at hand.  Mine is mounted on a landscape timber (planted like a fence post) so that it is an easily accessible and at a comfortable height for me but it could as easily stand in a flower bed as a piece of garden art.
Hooks on the back wall hold garden gadgets and a clothespin mounted on the little door keeps gloves hanging and handy.
After 3 or 4 years of constant and appreciated use, I gave it a bit of a facelift last year with a new coat of red paint and it ought to be good to go for another few years.

The point is not so much 'this' project as it is the advantage of convenience, having things handy when needed.  
SO HERE ARE SOME ALTERNATIVE IDEAS:
* A large flower pot with a tray on top can store hand tools and double as a side table.
* An old, metal cooler can be used as part of your outdoor decor.
* An upright, metal school locker can be painted to either stand out or blend in and will house larger gardening tools as well.
* A wicker basket or footstool also works well on a porch, out of the weather.


Having the things I need, where I need them, when I need them is a huge time and effort saver and eliminates most of my "excuses".

Monday, May 12, 2014

Canning - No Pressure Green Beans

All my canning skills were developed by a group of church ladies in Virginia who had lived off the land for generations. I took their word as gospel and lessons learned from them have served me well for 30+ years. They did not use a pressure canner for green beans so I don't either. If you have any questions about safety, please refer to this LINK.
Green beans are as simple to process as they are to cook. So here's the way it goes...get out your canning supplies and set the process in motion:
  1. Sterilize jars, rings and lids and start heating water in your canning pot and bring a large, second pot of water to a boil.
  2. Start with fresh, beautiful, unbruised beans. (You will need about 1 lb. of beans per quart)
  3. Inspect each bean, cutting off both tips, removing and blemishes and cutting in bite-sized pieces. (If the beans have strings, it is better to snap off the ends, pull the strings off and snap them into pieces)
  4. Wash the cut beans under cold running water.
  5. Pack them into hot sterilized jars, leaving plenty of space at the top. (headroom)
  6. Add 1 tsp. non-iodized canning-appropriate salt to each jar.
  7. Fill each jar with boiling water to within 1/2" of top.
  8. Wipe threads.
  9. Add lids and screw rings on comfortably tight.
  10. Set filled jars in canning rack and lower into boiling water in canning pot. Put lid on pot. Be sure the water covers the jar tops by an inch or two. Add more boiling water if level drops.
  11. Bring to a boil over high heat and process for 3 hours. Begin timing when water returns to a boil. (Once the water returns to a boil, heat can be lowered to medium to maintain a soft boil)
  12. Remove processed jars to a folded towel to cool leaving air circulation space between jars.
  13. Once the jars are cool to room temperature, check to make sure lids have sealed. Remove rings. Wash the cooled jars, write date on lid and move to storage.
  14. Any jars that did not seal should be reprocessed or refrigerated and used within a few days.
Take responsibility for your own food safety. Before opening any home processed jar, check to make sure lid is still "sucked-down" in it's concave position. Never use anything from a jar if it is discolored, foaming or has an "off" smell. Always bring home canned green beans to boiling before serving.

Friday, May 9, 2014

Almost Free Garden Art

Don't throw away that faded lawn ornament or even that old bowling ball. Melted marbles, broken plates, tiles or pennies can be glued to almost any surface and grouted with no experience at all.  It's fun for all ages...and almost free! 
Inspiration or need usually motivate me, but sometimes it's more mundane - like just being bored.
I had tucked an old terracotta saucer into a flowerbed as a watering hole for the critters that pass endlessly by and would have been quite satisfied with the effort if the rain hadn't set in for days and days.  All I could do was stand at the window looking at the yard work that wasn't getting done.  Suddenly my saucer looked as dreary as the day, in its dark garden spot.  
Then, as if I'd lost my marbles, I dodged the rain and brought it inside.  One of the items on my dreaded to-do list had been to sort and properly store my increasing collection of melted marbles.  What a great rainy day project.  I filled the afternoon gluing the melted marbles in place, finding a use for that last bit of tile Thinset that was drying in its bucket.
On the next sunny day, I did the messiest job of grouting you can imagine, just smearing it around with my hands...
 mushing it into the crevices and filling all the gaps.
After the grout dried for 10 minutes or so, I wiped it down with a sponge, clearing as much of the marbles as I could and polished them later with a dry cloth then set it inside to dry and cure completely for a week or so.
This is a cool product, (not the coating seen on TV).  This was recommended by the paint department manager and was actually cheaper than the "other" product.  I bought the clear-coat and gave my project a good water-proofing spray both inside and out...just because terracotta is so porous and we get mildew here easily.
 And that was it.  The dark spot in my little flower bed is now a little lighter and has a touch of color.  The critters have a place to visit and I had something to do on an otherwise unproductive day.
Now I'm looking for an old bowling ball at yard sales so I can get the grandchildren busy covering it with pennies...(copper keeps slugs out of the garden)

Monday, May 5, 2014

Big Savings on Avocados

The Truth about Freezing Avocados
Since my desire for avocados so often coincides with their highest prices of the year, I decided (while the price is down) to test the rumor that they can be frozen.
I was only willing to risk 1/2 of the perfectly ripe avocado...seeded but unpeeled, wrapped in plastic wrap and frozen overnight.  So far, so good.
Once it thawed, I discovered the limitations.  The texture is that of a mashed avocado...perfect for guacamole, dressings, smoothies and sauces but not available for slicing.
It hadn't turned brown at all and a little lime juice maintained the color for making guacamole.
The flavor and consistency are spot on...every bit as good as fresh.
I'll stock up while they're cheap and enjoy the savings all year.

Sunday, May 4, 2014

"They Say This Was Just A Hobo"

A couple miles from my house, a dirt road wanders through hundreds of acres of logged timberland.  As far as the eye can see, it is a desolate and barren landscape.  In the distance, the ribbon of dusty road, like a necklace, circles a small hill showing signs of spring green amidst the sea of gray.  Atop the hill is a small, country graveyard with stones both old and new.  
I was struck by the number of markers placed during the 1920's.  Many of them were homemade.  Too many of them were toddlers and babies and I thought of the tales my mother told of growing up during the Great Depression.
I thought of the hardships and the heartache and I wondered what these people would think of us today, with our cars and computers, cell phones and medical services.  I considered that they would have no understanding of our complaints and remembered my mother telling me that her family never thought of themselves as "poor" even when her sisters took turns going to school because they only had one pair of shoes between them.
I found myself admiring that past generation, the people who bore hardship we can only imagine and bore it with dignity. 

Then, I came upon the stone that twisted my thoughts and my heart in ways that I can't explain.
  "They say this was just a hobo".  
A nameless someone.  Like soldiers in unmarked graves.  The anonymity of it all.  To be a son, a brother, perhaps a father and to die unknown, among strangers. 
And then my thoughts took a different path; the strangers had laid him to rest.  They had provided the grave and the casket and they stood at his side, and someone made a stone and hand-chiseled all they knew to say about this man.  
Those who had so little, paid tribute to one who had even less.  
I was touched and compelled to share.

Friday, May 2, 2014

(6) The Little Garden and the Big Storms

This "last week of April" spate of storms that endlessly trudged north from the Gulf causing horrific tornadoes and floods, brought some of the most amazing weather effects I've ever witnessed...high winds and almost frightening gusts, lightning on top of lightning so much so that the darkness was continually lit with a flickering light, hail and rain from every direction at once and thunder so much on top of itself that it was like being under a train trestle.
My little corner of the Florida Panhandle was surprisingly spared extensive damage while other parts of my county and surrounding counties were hit very hard.  I dreaded the thought of the damage to my little hay bale garden...but nothing.  
The cabbages are heading and the outer leaves are enormous.
The squash is making all over the place.
The eggplant, which struggled with bugs for some reason, is now setting big blooms.
The tomatoes are healthy and covered with their yellow promises.
And, there are beans enough for dinner now and will surely be enough, in time, sufficient for canning.  Click on this LINK for detailed instructions on canning green beans.
On the deck, the Jalapenos are beginning to grow...
and the Meyer Lemon Tree is setting its first fruits.  
I'm keeping my fingers crossed on this one.  It had an over abundance of flowers, most of which were beat off by the torrential rains.  We'll see.