Wednesday, February 27, 2013

Sourdough

Shortly after arriving in Alaska. a friend gave me a bit of Sourdough Starter that had been kept active since the late 1800's and I baked bread with it all the time including on camping trips.  Unfortunately, my starter didn't survive the move to Florida. 
Last week, in a moment of serious nostalgia, I mixed up a 'Starter' recipe I found in a 1959 Farm Journal cookbook:
SOURDOUGH STARTER
In a stone crock, glass or pottery bowl, mix together  1/2 pkg Dry Yeast (1 1/4 tsp),  2 cups sifted Flour, 2 Tbsp Sugar, and 2 1/2 cups Water.  Beat well.  Cover with cheesecloth and let stand 2 days in a warm place.
After just a couple of hours, the volume began to increase.
Above is my well-worn, personal page of Starter Handling instructions that I kept with my bread making things in Alaska.
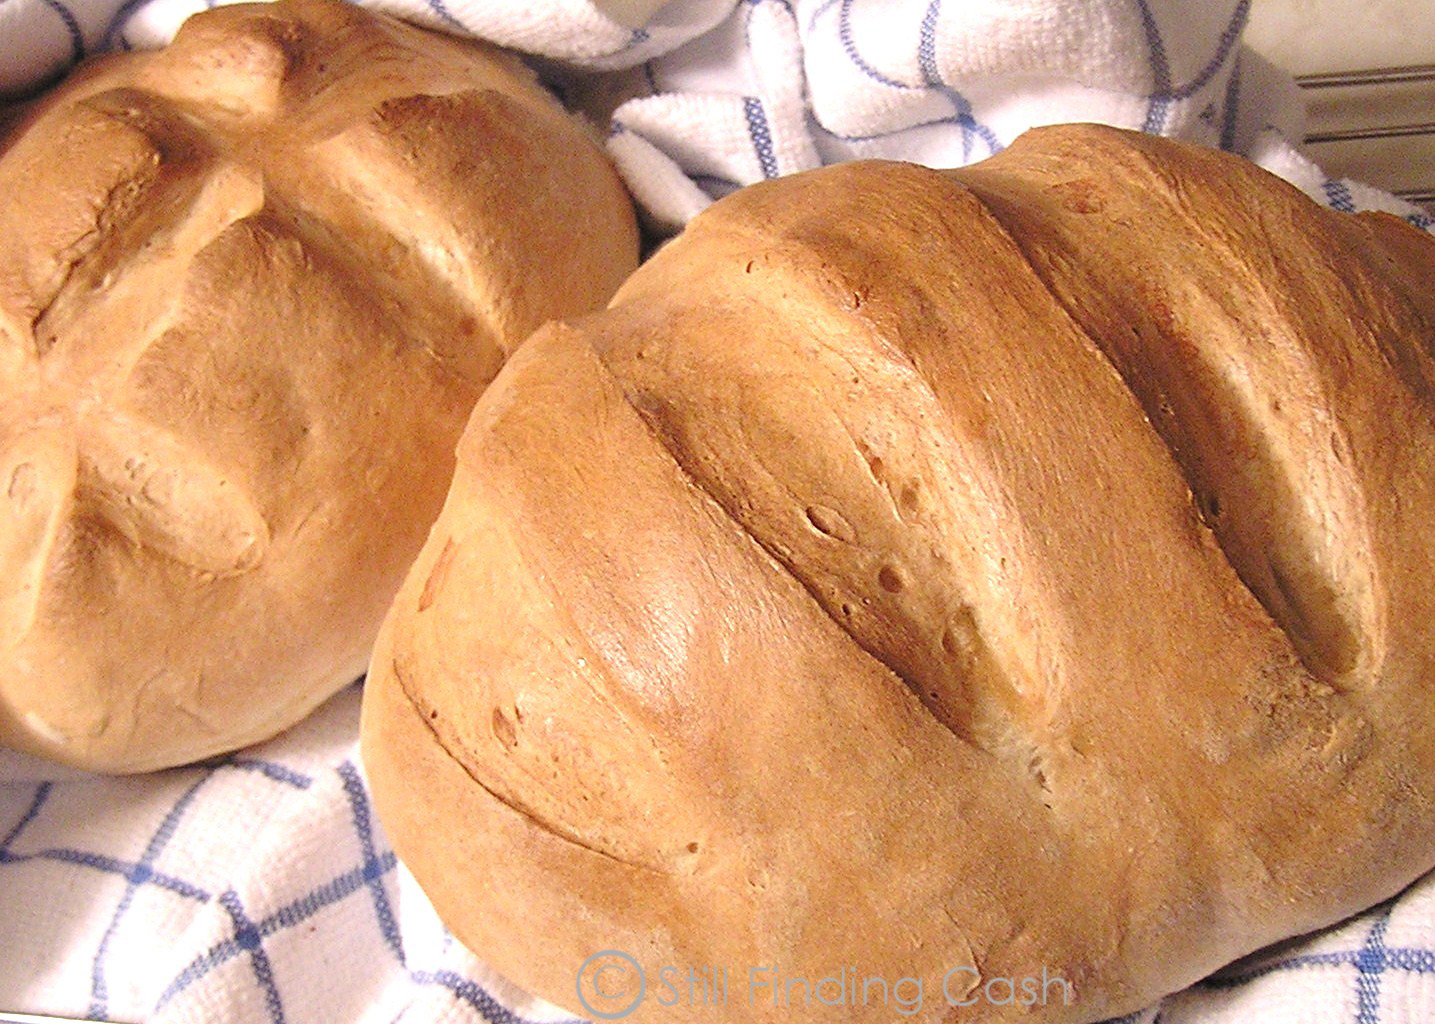
It is the Sourdough Starter that gives the rich flavor to the bread.  This new starter of mine doesn't have quite the heft that the old Alaska starter did but I'm hoping that it will develop more over time.  Once there is starter in the kitchen, there is no end to the possibilities.  Recipes are all over the internet.  Today, I'm making Sourdough Cinnamon Rolls. 

Thursday, February 14, 2013

Homemade Crackers - Quick n' Easy

Well, it's day 69 and I'm behind on the blog again.  I haven't been able to do much because my back is not happy with me standing so I thought I'd share a very old Southern Cracker Recipe that takes no time at all to prepare.
I made my crackers small, about 2" x 2" and they shrank a little more as they dried.  But they are delicious with either sweet or savory toppings.  You should have all ingredients on hand so give it at try.  I think you'll be glad you did.  Here you go:
Sift together:  1 cup All-Purpose Flour, 1 tsp. Baking Powder and 1/4 tsp. Salt.
Cut in 1/4 cup (1/2 stick) Butter to the texture of coarse meal.
Add 1/4 cup Milk, all at once and stir until dough forms a ball.
Turn out on lightly floured surface and knead gently, 8 to 10 times.  Roll to 1/4" thickness and cut with standard biscuit cutter. (I used my pizza cutter to make square crackers because my biscuit cutter is very large.) Place on greased cookie sheet.  Bake at 400 degrees for 10 minutes.  Remove from oven and split the hot crackers in half with a sharp knife.  Return to oven, cut sides up, and bake another 4 to 6 minutes.
I turned my oven off, opened the door and let the sheet of crackers remain in the cooling oven to dry out thoroughly.  The taste and texture is much like that of Sailor Boy Pilot Bread, Alaska's favorite cracker and if I had made them large and round they would even look similar. They are great.  I'm getting ready to eat a bunch with cream Cheese and Pepper Jelly.  Sorry I didn't think of that in time to get a photo.

Thursday, February 7, 2013

Over-the-Top Chicken Salad

Chicken Salad, can be more than a mush spread for sandwiches and it doesn't take a chef to move it to dinner fare. 
Avocado stuffed with Chicken, Walnut, Apple Salad
The key is to use nice cubes of chicken and mix them with things that go crunch and with a bit of something sweet and something unexpected.  Usually I stuff a tomato but this time I piled it high on an avocado half and sprinkled grape tomatoes over the top.
Cubes of Granny Smith Apples add moisture and just a touch of sweetness.  Here's my list of ingredients but they aren't 'must haves'.  Just toss in things you like and be generous.

INGREDIENTS
1 cooked, cubed and salted Chicken Breast
2 coarsely chopped Hard Boiled Eggs
2 slices of Sweet Onion, minced
Toss with 2 Tbsp. Mayonaise
Add:
1 Granny Smith Apple, which has been diced and drenched with the...
Juice of 1/2 lime. (save enough apple for thin-slices garnish)
1 cup Walnut Halves, broken
Mix all and toss together

Greens (any kind will do)
1 Avocado, quartered & drizzled with lime juice
Grape Tomatoes, halved
Snow Pea Pods (just because I had them)

On a bed of greens and snow peas, place 2 avocado quarters.  Pile on Chicken Salad.  Sprinkle with tomato halves.  Squeeze remaining lime juice over all.  Garnish with thin apple slices.  Serve with toasted French or garlic bread.

Sunday, February 3, 2013

Super Bowl Football Poppers

Awwwww!
All football heroes are not found on the field.  Some are in the kitchen with a little imagination.   A few 'strings' of shredded Mozzarella, placed as laces as soon as your poppers come out of the oven, turn your 'poppers' into little footballs.  How cute.

Friday, February 1, 2013

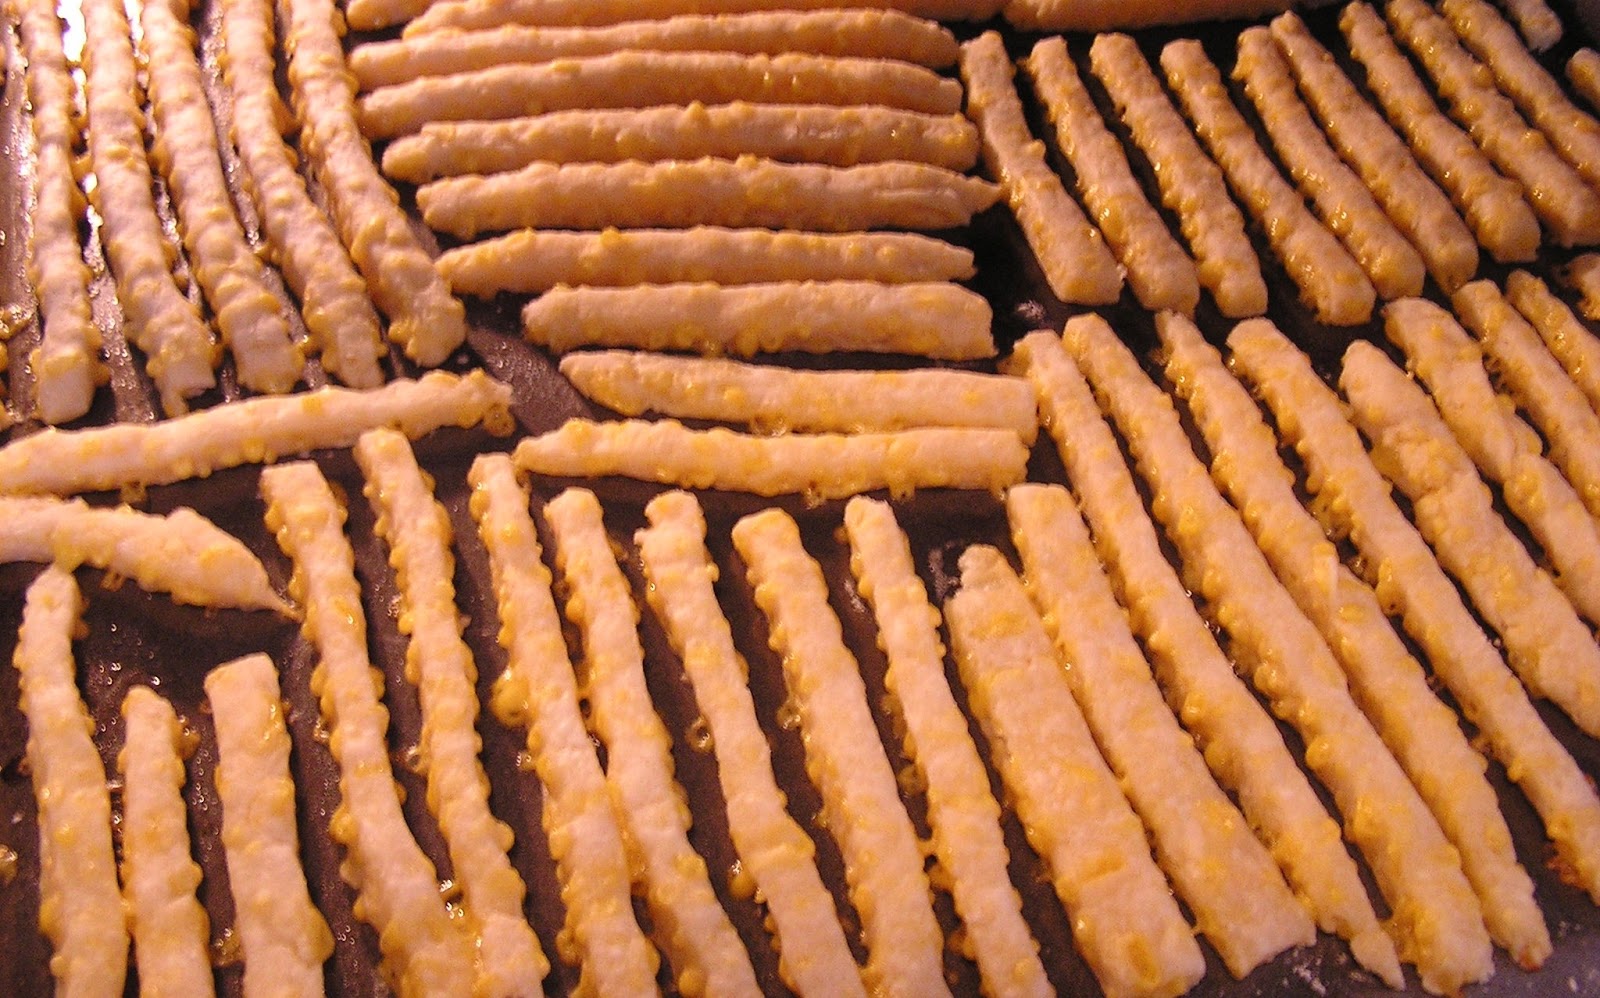
Cheese Straws #2

...the perfect accompaniment to tomato soup!
RECIPE IN POST BELOW

Thursday, January 31, 2013

Cheese Straws - Recipe

Day 55 - Cheese Straws...it's a Southern thing!
Suggestion:  Serve in votive holders wrapped in team-color ribbon
Making party plans for the Super Bowl or looking for alternatives to the grocery store assortment of crackers...try the easy Southern art of baking Cheese Straws.  The dough mixes up in nothing flat and they bake in 5 to 7 minutes.  You can make them spicy hot or just enjoy the cheezy goodness...and the best part is that they are cheap - cheap - cheap!

INGREDIENTS
2 cups all-purpose Flour
2 cups grated sharp Cheddar Cheese
3/4 cup Butter
1 tsp. Baking Powder
1 tsp. Salt
1/2 cup Cold Water
For zing, add 1/4 tsp. Cayenne Powder OR add 1 tsp. Louisiana Hot Sauce to the Water
DIRECTIONS
Combine dry ingredients.  Toss with cheese.  Add butter (cut into small pieces) and mix thoroughly until well combined.  Stir in water, a little at a time, mixing to make a stiff dough.
Divide dough into 4 pieces.  Roll one piece at a time into a long rectangle, 4 to 5 inches wide, until it is about the thickness of a pencil.
Cut into strips.  A Pizza cutter works well for this.
Place strips on a greased (or sprayed) baking sheet.
Bake in preheated oven at 400 to 425 for 5 to 7 minutes - until golden brown.
Note: bottoms should be slightly browned.

This recipe makes enough to completely fill a gallon size Zip-Lock bag.
They are wonderful served plain as snack crackers but can also be used with dips.  Try a spicy Creamy Horseradish or cool Cucumber Dill.

Thursday, January 24, 2013

Day 48 - Thoroughly Crazy Start to 2013

Whew!  I didn't intend to take so long returning to the blog.  This Pneumonia thing has been hanging on much longer than expected.  The worst of it was about four days ago and progress has been slow but steady since then; thank goodness.   
First it was Hubs, then me and it seems that everyone I know from Florida to Alaska and parts in between either has or is close to someone who has been affected.
There is a crazy Flu, Respiratory junk, Pneumonia and Meningitis running rampant all over the country.   
The weather is is also weird...up and down the scale from below freezing one night followed the next day by temperatures in the 80's here in Florida and there is no snow with summerlike temperatures in the 50's in Alaska.
My Azaleas are blooming and the roses have put out new leaves in the middle of January...fully two months early. 
Strange.  Strange.  Strange.

Wednesday, January 16, 2013

Day 40 - Why I'm Counting UP ......................... the Days of My Life

Two areas of thought sort of merged into one idea for me.  First there was my birthday and the knowledge that when both of my parents reached my age, they were actually in the process of living the last year of their lives and surely didn't know it.
I pondered the thought and wondered; if they had known it was their last year, would they have looked at each day differently? 
The general concept that life is lived between the dates filled my mind, rolled around for awhile and then drifted away.
When children counting down the days until Christmas on their Advent Calendar caught my attention, the thought of 'days' returned and  before long the two trains of thought came together on the same track.
"Live every day as if it is your last",  sounds good but it's too abstract to be practical or put into practice, at least not by me.  I seem to need a gimmick, not just a nice but fleeting thought that will float away on the next breeze.
What can I say?  I do my best thinking at the beach.
So, I began to work on a way, for me, to actually be conscious of each day.  What would deter me from wasting even one of them?  What would encourage me to inject something, a thought, an activity, a deed, anything in each and every day that would mark each day as 'time well spent'?    

When we get older, time can really mess with our minds.  Since there isn't the dreaded Monday, or hump day or TGIF, there is a tendency for days to run together, for weeks and months to slip by almost unnoticed.  The grandchildren seem to grow much faster than our own children did.  Just about the time all is well in the world of our families, someone upsets the apple cart; a new child happens or a family falls apart.  And, all the while, we wonder how those things could have happened so quickly; wasn't it just yesterday that they were all children?
It seemed that I needed something besides a calendar to keep me up to date.  And, I realized that I needed a constant reminder that each day is truly a gift from God and should not be wasted...so I started counting UP the remaining days of my life.  I have no idea how long I'll be doing this or at which number my counting will end.  But I do know that numbering my days makes each one of them special in its own right and makes me acutely aware that each morning I get to greet is a blessing.
Just sayin'
So, I will continue this little crusade of mine to count UP the days of the rest of my life.  No, I will not have a post for every single day as I have for the first 40 days, but I will be faithful to the blog and post a couple days a week....and...I will continue to keep the count on the blog.

Tuesday, January 15, 2013

Day 39 - Hospital

Since my doctor was to be on call at the local hospital today, he suggested that I come in through the E.R. for a chest X-Ray and to report on reactions to yesterday's meds.   Yes, the image showed the Pneumonia as well as what the doctor termed as 'remarkable healthy looking lungs'.  Hurray for that!  Some of the meds remained the same, dosage was fine-tuned on others and a couple more were added as well as another shot. 
But the best medicine of the day was the bag of Chips Ahoy chocolate chip cookies that Hubs made a special trip to the store to get for me.  So, with cookies in hand, a warm blanket, milk for dunking and a serious belief in a better tomorrow, I am ready to settle in for the night.
Tomorrow I'll share the reason for counting UP the days of my life.

Monday, January 14, 2013

Day 38 - Hello, Pneumonia

Didn't want it.  Got it anyway.  Much prefer the treatment for Spring Fever.
Sharing some of my "Springtime around the ol' homestead" photos with you.
But this year a Spring Tonic and a good Seed Catalog didn't quite do the trick. 
I prefer Burpee's to breathing treatments and Gurney's to prescription antibiotics... and, of course, the Henry Fields Catalog to the ER. 
So, if there is no post on Day 39, my appologies in advance and I'll be back as soon as I can.
It rained a bit last night and was 80 degrees here today.  So the weatherman is with me in being completely out of sync with mid-January.
May we all be well.

Sunday, January 13, 2013

Day 37 - Still Thinking Spring in January - - - Cold Frames

Today's warm and balmy weather only serves to intensify yesterdays dreams of Spring.  Knowing how fickle the weather is and remembering the loss of so many seedlings to late-season freezes over the years, I've begun to consider the possibility of building a "Cold Frame".   After a little research, I'm leaning toward this design found at "Instructables".  It makes use of old, discarded windows and I happen to have some.
Then there was this super-sized one posted by the TV show "This Old House".  It could even be made using old French doors.
But I think my favorite site is this one by "Dummies".  The instructions are perfectly detailed and quite elementary.  (Besides, I like the little bunnies.)
But, if you are not so handy with a hammer or just don't have the urge to build, like I do, there are several sites that offer lots of easy-to-assemble kits like this Mini Green House.
If you have even grander visions for getting a jump on the weather, I found an online catalog offering all kinds of kits for cold frames and greenhouses and you can shop by brand or size or type or usage.
I might be stuck indoors and not feeling one bit better but I can still enjoy the open windows, the warm breeze and busying myself with lists of things I want to do once Spring shows up for real.

Saturday, January 12, 2013

Day 36 - Seed Catalogs

Well, the days are getting longer and the temperature is getting warmer.  Actually 'unseasonable' warm.  It was almost 90 degrees here today.  The sun was shining and it was like the heavens were calling, "Come out.  Come outside to play."  
Unfortunately I'm still too sick to go out to play but I did make it as far as the mailbox in hopes of being blessed with a Seed Catalog or two but no such luck, no Burpee's, or Gurney's, or Henry Field's.  Still, a body can only take so much television so I hunted in all the usual 'stash' places until I found some of last years catalogs.  My "I want" button was immediately pressed and I filled the margins with check marks as if I had good sense...or an unlimited budget. 

I'm certain that the marketing teams who arrange these pages filled with photos of colorful blooms and mouthwatering fruit are aiming their message directly at people like me...stuck indoors, impatient for spring and perfectly willing to spend a few dollars now as some sort of emotionally satisfying proof that spring actually is just around the corner.

Friday, January 11, 2013

Day 35 - Light Up Your Life

Since I'm still sick, I'm taking the quick and easy way out in today's post by featuring a couple things from the past.  Just click on the wording to follow the links.
These are very simple projects with easy-to-follow instructions.  Enjoy.  I hope to be on top of my game soon.

Thursday, January 10, 2013

Wednesday, January 9, 2013

Day 33 - Organizing for 2013

Since organization saves time and 'time is money' and especially since I've spent two days looking for something that I carefully put away and now cannot find, I thought getting better organized might be an appropriate place to start a new year.  I found these images inspiring and hope they will trigger ideas of your own.
++++++++
The following are links to some ideas I thought were clever or useful...like camouflaging a storage box with book spines for your library shelf.
An organized way to store bed linens, especially those for children or guest rooms.
I would never have thought to create shoe storage using PVC pipe and a little Gorilla Glue but, wow, it works.
And, thinking about using tubes for storage, how about this idea of using toilet tissue tubes for cable storage.
This is one of my favorites.  First of all, what a great idea it is to know the height of things to be stored when building shelves for them.  Just the photo alone is informative but the blog post actually walks you through the build-out of a pantry.  The LINK is worth a peek.
None of the above photos or ideas are mine but I do plan to put a couple of them to good use.  If you have organization tips of your own, please share them in a "COMMENT" below.  Thanks.

Tuesday, January 8, 2013

Day 32 - Make a Table - Idea Starter

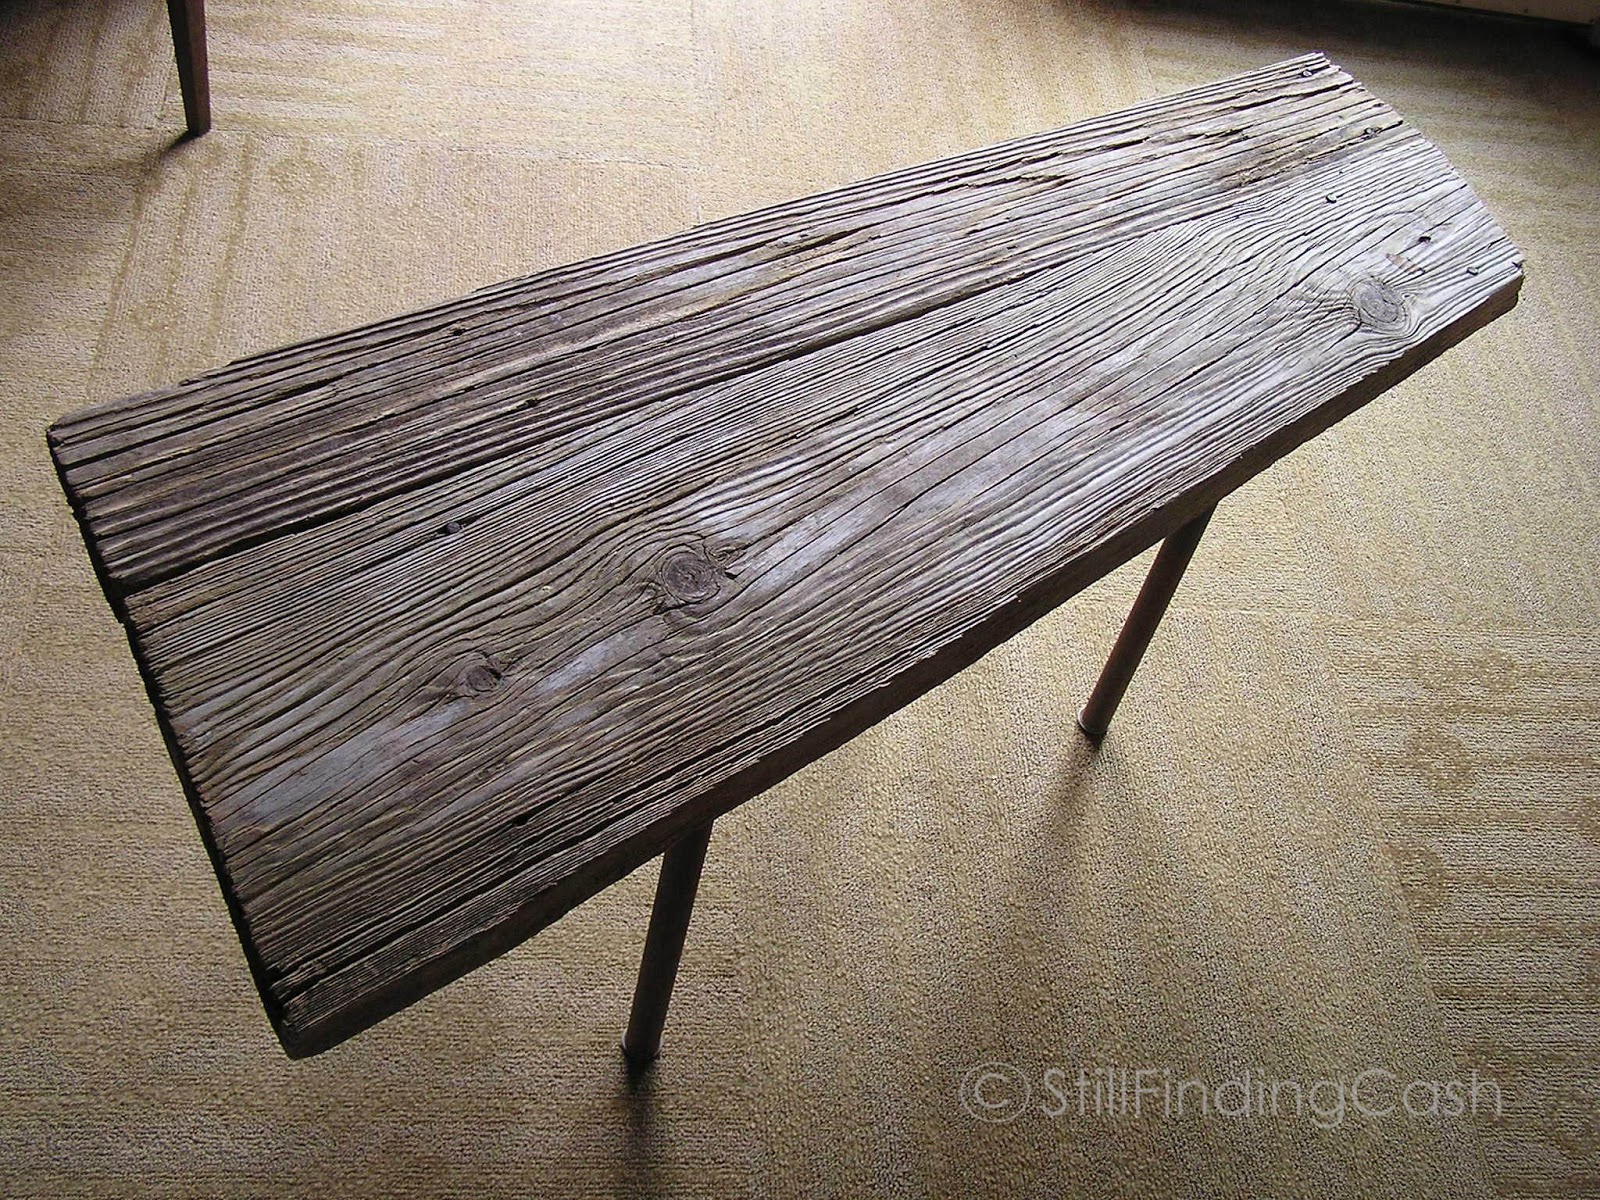
If I could take pictures of the things in my mind, I'd show you how this simple table construction technique can be adapted to several styles of decor.  Mine is a thoroughly rustic coffee table, long and slender, with no square corners.  It doesn't even have parallel sides.  It is made of old deck boards that are joined with metal plates screwed to the back (bottom).  
These particular legs are 1 1/2" standard, threaded, 'black' pipe painted with RustOleum 'Rust' Metallic Paint.  They are attached using plumbing flanges which take the threaded end of the pipe.
Pipe for legs comes in a variety of diameters, some much larger than the ones I chose.  Flanges are available to fit each size pipe.  Coffee tables, side tables, or even book shelves can be made using this simple and relatively inexpensive technique.
For a Shabby Chic look, an old door could be used for the top...even an old cabinet door for a smaller table.  The legs could be painted white, then scratched and sanded.

For a Country Cottage or Farmhouse look, new boards can be used for the top, painted and sanded or antiqued.  The legs could be painted Flat Black or a Rubbed Bronze.

For an industrial look, any smooth surface top would do with heavier legs and the whole table painted with something like a Hammered Silver. 

It's just such an easy to make 'something from almost nothing' that I wanted to share the idea.

Monday, January 7, 2013

Day 31 - Save with 'Bulk' Cooking

Until recently, I would buy 20 pounds of ground meat, 3 to 5 chickens, a couple of Boston Butts and a couple of large beef roasts to cook in a single day.  Volume cooking saves money as well as time.
Now that we are older and alone and eat less, as well as less often, I cook in smaller volumes but the method is the same.  "Feed the Freezer to Feed the Family".  Actually, the time involved would be very much the same regardless of the volume.
The idea is to cook to fill the freezer with meal-sized or individual, portion-sized packages.  By using the stove top, the oven and the slow cooker at the same time, a great deal can be prepared in a single morning or afternoon.
Generally I will use the oven for roasts and meatloaf, the stove top for chicken and the slow cookers for stews and pulled bar-b-q.
Today, I was less aggressive but here's what I accomplished with no more than an hour in the kitchen.
My favorite Roast Beef method is so very simple.  On a double layer of Heavy Duty Reynolds Wrap, place a couple of thick onion slices, half a package of Lipton Onion Soup Mix and the roast.  
Top the meat with a couple more onion slices and the remainder of the soup mix.  Tightly wrap and seal the foil, place in a pan and in a 450 degree oven for 30 minutes.  Reduce the oven temperature to 325 and roast 2 to 3 hours more.  The flavor is wonderful and the au jus is rich and flavorful.
At the same time, I used the stove top to make a small portion of herbed, bread stuffing.  Stove Top brand is just fine but I usually buy an organic mix.
Mound the stuffing on top of one pork chop after another, stacking them as you go.  Tie the stack of chops in a tight bundle, tightly seal in foil and place in a pan.  This can go in the oven at the same time as the roast beef.  
Check this LINK for your cooking time but open the foil 30 minutes before it's finished to let the top brown.
Once the oven was filled, put a package of chicken thighs and one of boneless, skinless breasts in a pot with a little onion and celery, salt and pepper and just enough water to almost reach the top of the chicken.  Cover the pot, bring to a boil and reduce heat to barely a simmer for about an hour or until the chicken is fall-apart tender.  A slow cooker also works well for this.  Cool the chicken parts before removing skin and bones and pulling the meat apart with two forks.  I'm going to make bar-b-q with half of mine and just freeze the rest.
Be sure to strain and keep your beautiful, yellow chicken stock for use at some other time or go ahead and make soup or chicken and dumplings or whatever strikes you.

In addition to these things, today I made a huge supply of spaghetti sauce.   This evening I will package everything in individual portion sizes but right now, we're ready for a dinner of stuffed pork roast with apricot glaze, herb roasted potatoes and a salad of field greens.  Gotta go!