
There is magic in a morning on my deck. Weary, wilted leaves from yesterdays' scorching heat are revived. The plants look healthy and happy and flowers holding promise continue to appear. They show no sign of earlier battles against the wind, invading insects or bent and broken branches trimmed away or tied in place while nature makes repairs. Perhaps the sweet satisfaction that comes with a harvest is made possible because of the care and watching and work along the way.
 Perhaps the sweet satisfaction that comes with a harvest is made possible because of the care and watching and work along the way.
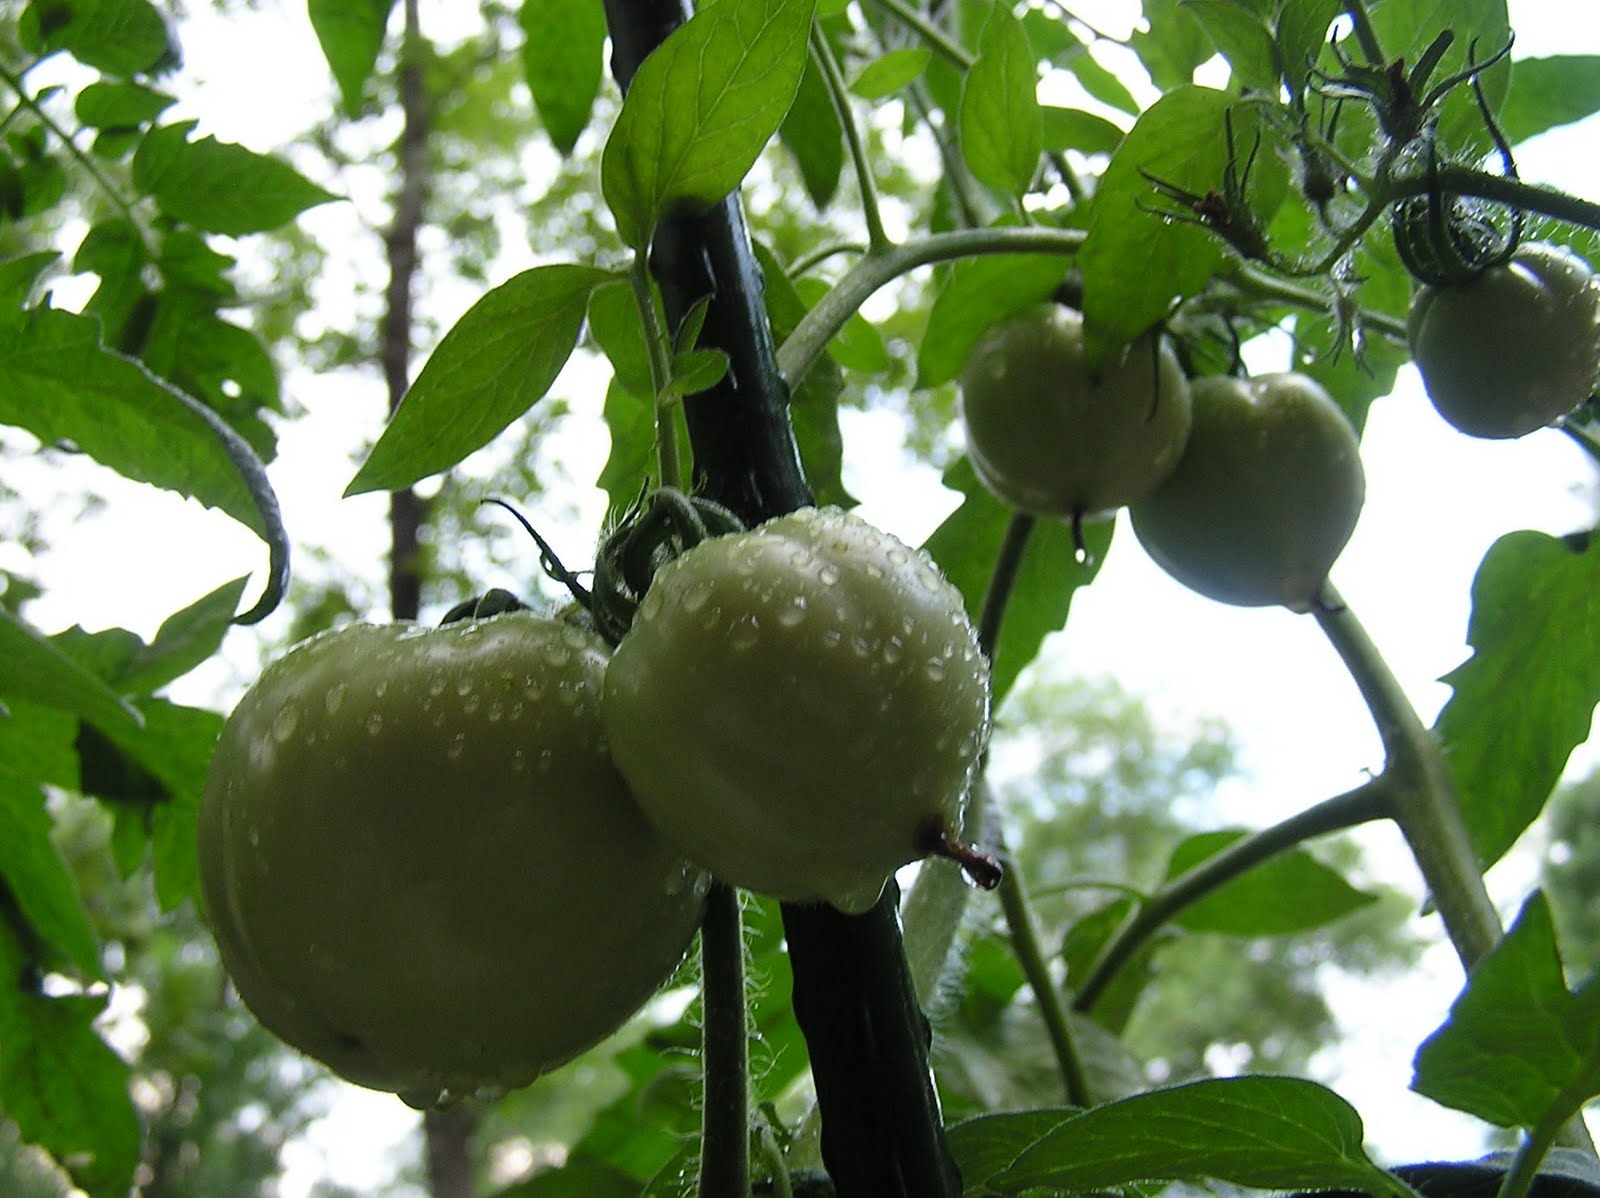
 I've chosen a heritage variety of tomato that matures relatively small, about the size of tennis balls. At this size, it will take about 9 tomatoes to fill a quart jar or about 10-12 pounds of tomatoes for a 7 quart "batch". Always begin your canning with clean, sterilized jars, rings and lids ready and waiting, submerged in simmering water.
 Wash tomatoes in cold water, eliminating any with blemishes or soft spots. Remember that your finished product will be only as good as the ingredients you use.
 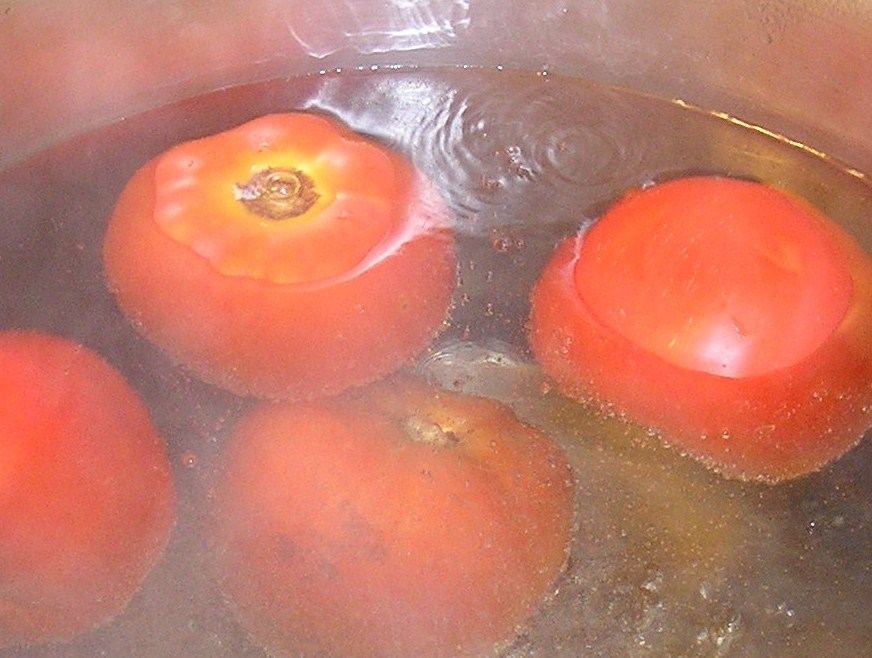 Peeling the tomatoes is a bit of an assembly line project. A few are being peeled and placed in a jar while the next next few are getting a hot bath. To begin, place only 3 or 4 tomatoes in a large pot of simmering water for a minute or two. Each time they are removed from the hot water, replace them with 3 or 4 more to be heating while you are coring and peeling the previous batch.
 Remove the tomatoes from the hot water with a slotted spoon or strainer and plunge them immediately into a container of ice cold water. This will stop them from "cooking", make them cool enough to handle.
 With the tip of a small paring knife, cut out core and cut away any blemishes and under-ripe areas. The skins will slip off easily once the core is cut away. Tomatoes may be cut in half or quartered or left whole. Add tomatoes to jar, one at a time, cut side down...
 pressing them into place on occasion to pack tight, help remove air bubbles and begin to extract natural juice.
 When a jar is filled, slide a narrow spatula around sides to remove air bubbles. Adjust surface level to make sure there is 1/2" of head space by removing some of the contents or by adding a bit of boiling water. Add salt and lemon juice to each completed jar: 1 Tbsp of non-iodized, canning or pickling Salt and 1 Tbsp bottled Lemon Juice per quart (1 tsp. each for pints). With clean damp cloth, wipe jar rim and threads. Put on hot, sterilized lids and rings and tighten, comfortably tight. Continue with next jar.
 When all jars are filled and capped, put them in canning rack and lower into boiling water. Be sure water level is 1"-2" over top of jars. Cover pot. Begin timing when water returns to boil. Process for 45 minutes at 1,000 ft elevation or below. (Check with your extension office for higher elevation instructions) Place processed jars on a folded towel to cool, leaving room between jars for air to circulate. Do not tighten loose rings while jars are hot as it may break the seal. When jars are completely cool, remove rings and wash each jar with a warm, soapy cloth, rinse, dry, mark date on lid and move to storage. Rings may be reused.


+-+Copy.JPG)


No comments:
Post a Comment