Sunday, March 29, 2015

No-Bake "Resurrection Cake" for Easter

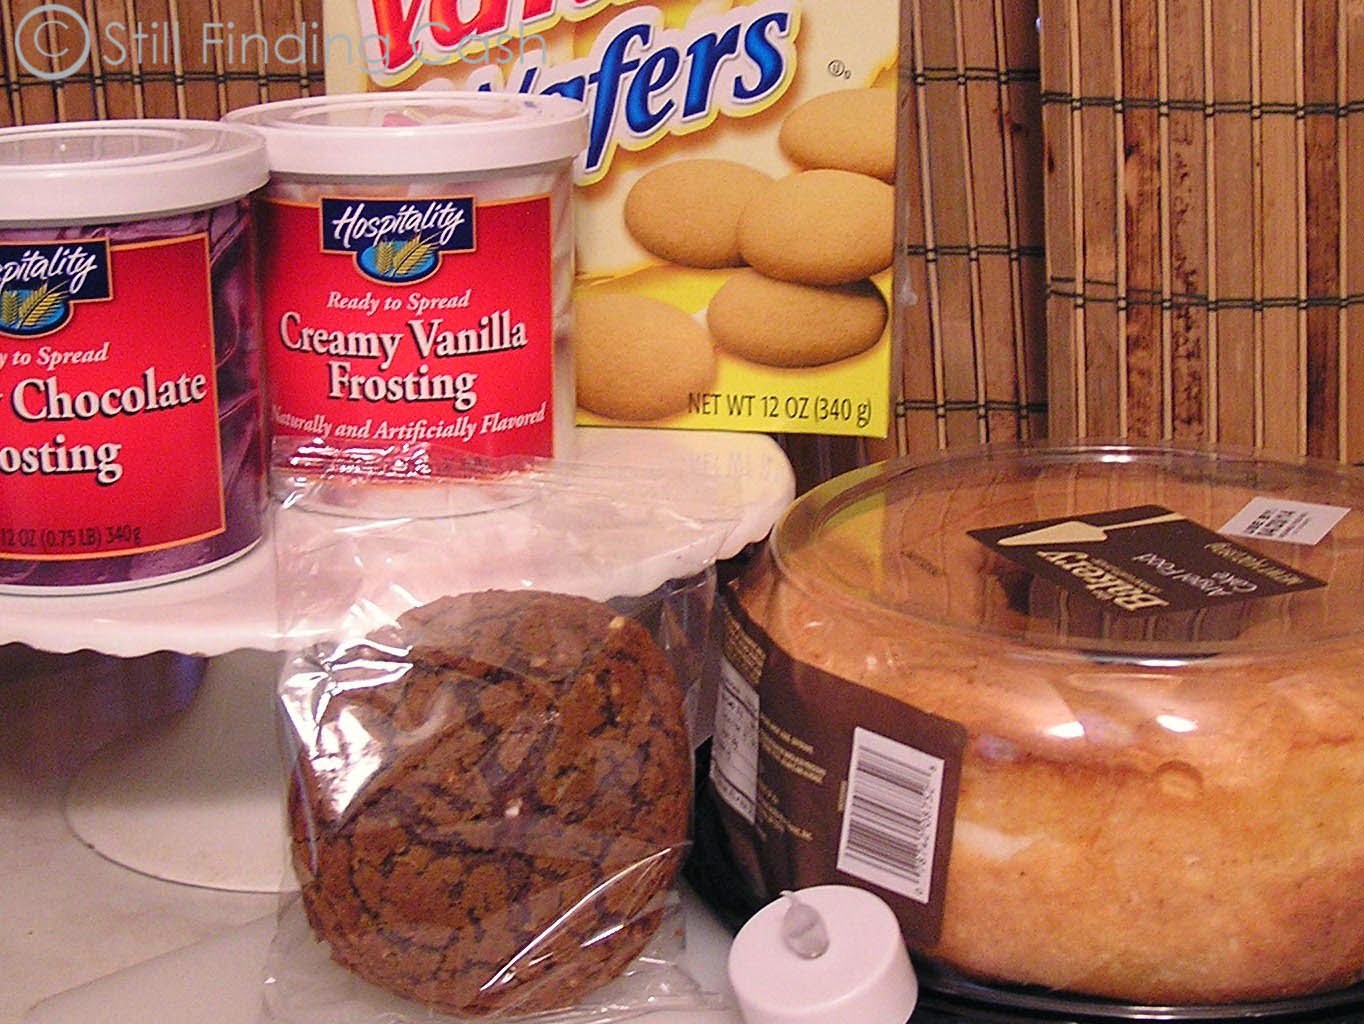
 Sometimes an idea starts rolling around in my head and will not be gone....like Easter = empty tomb = resurrection.  So, here I am, with these supplies and high hopes.  But I can tell you right now that the Marshmallow filled, Oatmeal "Pie" is likely too soft to do the job I have for it.  We'll see.  So, here goes...
I supposed that a mixture of chocolate and vanilla icings would result in either a beige or a gray, either of which could reasonably pass for the color of rock.
I cut the cake to stand it on end, then cut a slice or the remainder to fill in the back...
and cut the little end piece in half to help round out the shape.
 Added a little icing between the pieces to act as glue (I used the Chocolate because it looked like I was going to need much more of the Vanilla for color).
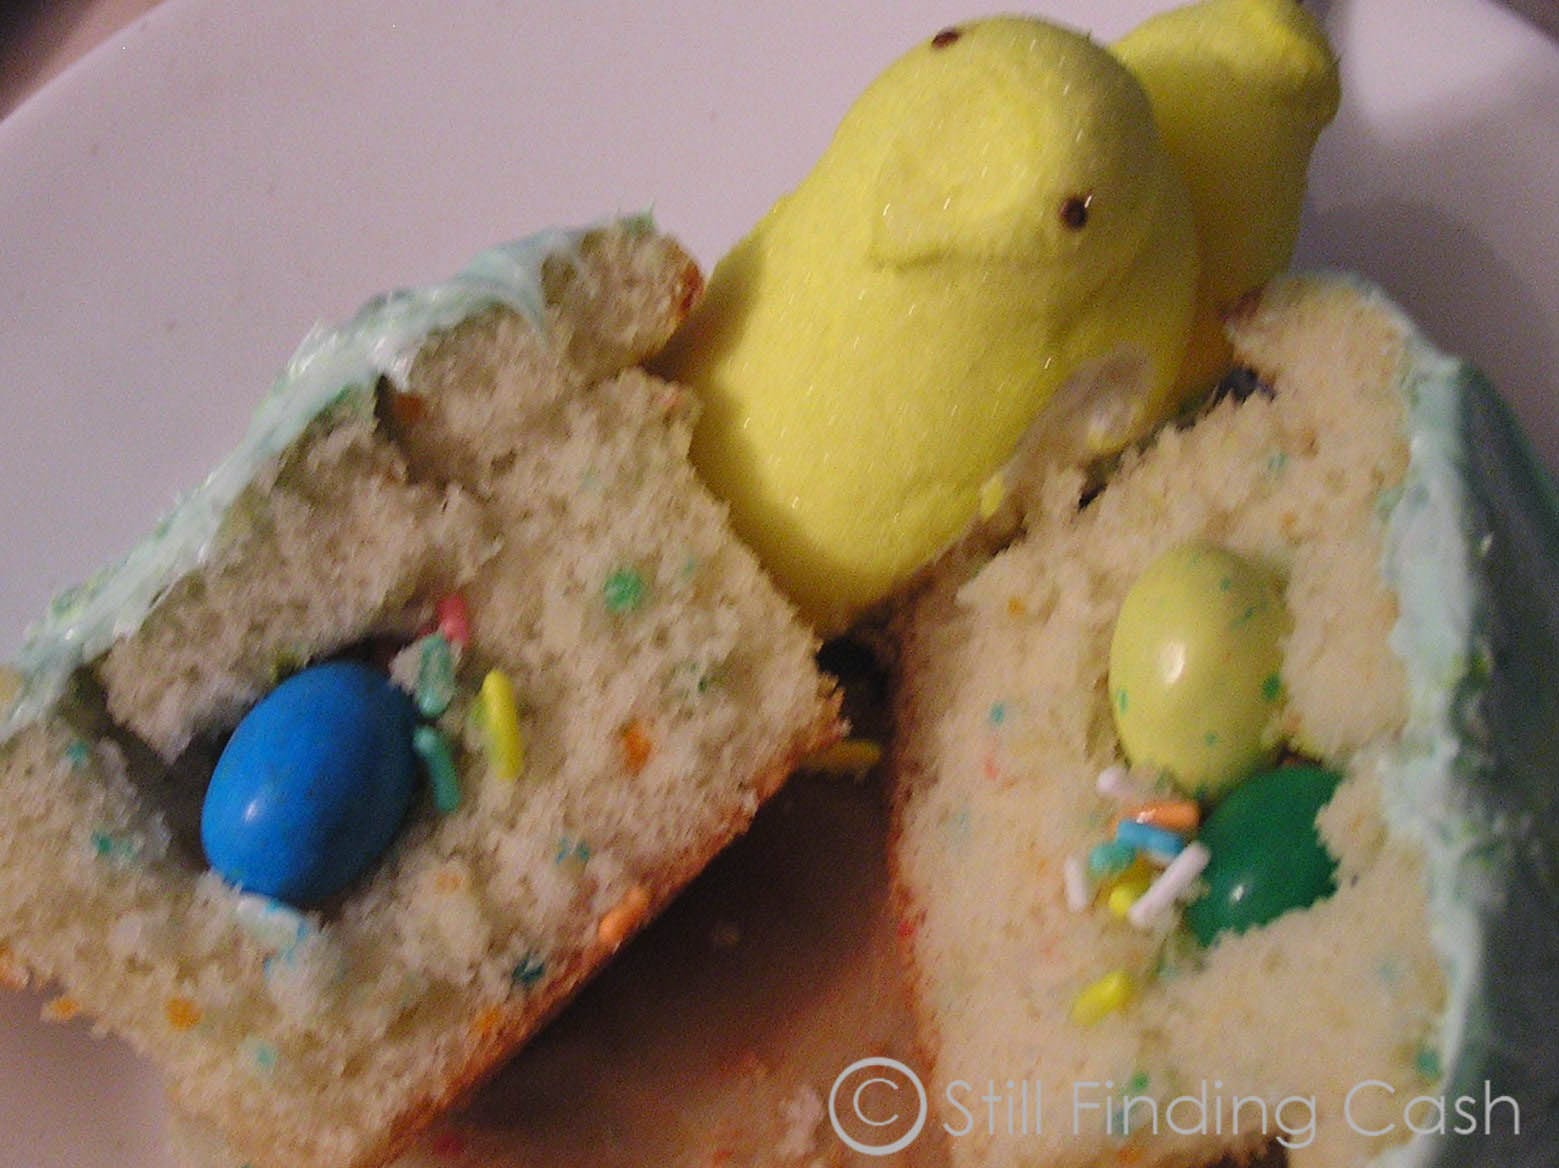
Then, on to icing the whole thing taking no care at all with mixing the colors...just letting it blend as it wanted to.
I did, however, use more Chocolate around the base and blended it on to the plate.
Now for the most dreaded experimental part: Crushing Vanilla Wafers into "Sand" and "Pebbles".  Oh, what ever did we do before zip type bags?!  Crushing was actually easy although patting the crushed cookies onto the icing was a bit messy.
The secret to using the cookie/pie (as the large stone that sealed the tomb) was to open it and "fill" it with the lid from one of the icing containers.  Stiff plastic...just cut off the rim and it worked fine.
A battery operated tea light provides the glow from inside.
And there you have it...a No-bake Easter Resurrection Cake.

Perfect Glaze for Home-Baked Ham

Bake ham according to wrapper directions.
When ham has reached it's finished cooking time/temperature, remove it from the oven. Slice away any rind that is covering the fatty area. Cut a row of parallel slits through the fat - about 1" apart. Turn the ham and cut a second row of slits to make a pattern of squares or diamond shapes. Insert 1 whole clove in the center of each fat square. Spread yellow or brown Mustard over the entire ham surface and pack Light Brown Sugar over the mustard. (I use my hands) Return the ham to the oven for 10-20 minutes until the glaze is glossy and beautiful. It never fails!

Cindy's Easter Peeps Cupcakes

Cute and easy to make using mixes.
 Bake cupcakes as usual and cut a hole in each center using a melon-baller.  Save the removed "holes".
Fill holes with sprinkles and jelly beans.
 Replace "holes", removing a little from the bottom if necessary, and frost with green tinted icing.
Place a Peep on top and serve on a nest of Easter grass.
When the cupcakes are eaten, there is a little "nest" surprise inside.

Blowing Eggs for an Easter Tree

Sitting around a table with a group of children blowing eggs out of their shells is an amusing way to spend a warm, spring afternoon amid comments of "Yuk" and "Ewww" and "Gross" not to mention the comparison comments.
The operation is a 2-hole process that requires a bit of a light touch.  My preference is to use my trusty X-acto knife by planting the tip of the blade in one spot on the pointed end of the shell and twisting the knife back and forth.  Others at the table used an ice pick.  It was certainly faster but I had fewer accidents. The sharp edge of the X-acto blade acts pretty much the way a drill does but you are in control of the pressure and go at a much slower pace.  Eventually, there's a bit of eggshell "sawdust" and a grinding sound to be heard just before the tip of the blade pierces the shell completely.
Enlarge the hole slightly by twisting a bit more and repeat the process at the opposite end of the egg.  Next, insert a wire or a straightened paperclip into the egg and wiggle it around quite a bit.  The object is to break the yolk and mix the egg contents up as much as possible.  Then, lean over a bowl and blow.
While the color tablets are dissolving, there is time to rinse the insides of the eggs with water to clean them out as much as possible.  Then, dye as usual.  Just be aware that the empty shells want to float so they need to be turned or spun in the cups of dye.
The children had just as much fun dying and decorating these lightweight, delicate eggs as the hard boiled kind.  And, they were not as fragile for little hands to handle as one might think.  The twig for their tree was about 3' tall and held almost 3 dozen eggs. 
My twig was much smaller, holding one dozen eggs, and stands in a bud vase.
Ribbons or yarn or pipe cleaners can be used for hanging.  They can be threaded through and knotted (like I did) or hot glue can be uses to simplify things.  It's a pretty little decoration...a pleasant activity for adults as well as children.
It was a good day.

Tie Dye Easter Eggs & Other Ideas

Ideas for egg decorating and for candy making...even a recipe for the world's best Sour Cream Pound Cake.  Just keep on scrolling down.
 There's never a need to spend a cent when you can use the things you have on hand.
Vinegar (white or apple cider), standard food coloring, a few rubber bands and a wrinkled plastic bag are all that's needed. Oh, and a few hard boiled eggs!
Wrap rubber bands around some of your hard boiled eggs. Pour a small amount of vinegar into a little bowl. With your finger, moisten the surface of one egg at a time with the vinegar. Lightly touch the tip of a food coloring bottle to the moist egg. Quickly, pat the wet color surface with the crumpled plastic bag or hold the bag in your hands and roll the egg between them. If you want to use more than one color, leave a portion of the egg white and add the new color directly from the bottle, patting with the bag as you go. Try not to overlap more than two colors or they will blend into a yukky brownish color.
Unless you are fond of colored fingers, it is a good idea to wear plastic gloves. If you forget or, like me, don't care, a little bleach will bring you back to normal.
Sit the eggs aside to dry. After they have dried, remove the rubber bands and rub the surface with a drop or two of olive oil for a porcelain looking surface.

To see an earlier post about drawing silly faces with a Sharpie on plain white eggs and growing green hair atop the eggheads, click HERE.

Chocolate/Peanut Butter Eggs

It's difficult to break away from traditions like baskets full of Easter goodies even when the budget is groaning. But I remembered a long ago spring in West Virginia when a group of wonderful, farming mothers taught me to make candy and thought I'd give it another go.
The recipe is incredibly simple: equal amounts of smooth peanut butter and powdered sugar. 1/2 cup of each made these eight eggs. The mixture will be very stiff and if you can work in a little extra sugar, all the better. "Flour" your hands with powdered sugar and roll into egg shapes. Leave the eggs to sit on waxed paper for several hours to dry as much as the humidity will allow.
Melt about 1/2 square of Almond Bark. Put a dabs of melted Bark on waxed paper and top with each egg as you go. Dust your hands with powdered sugar if needed for easy handling. Allow the Bark to harden completely before handling further. These "bases" will give you something to grasp while dipping the tops of the eggs. If the base spreads out as it hardens, cut off the excess with kitchen scissors to maintain the 'egg' shape.
Once the Bark base is hardened, melt 1 1/2 squares of Almond Bark and stir in 1/2 tsp SOLID shortening - NOT oil or butter. Holding the eggs by their bark bases, dip into the melted Bark and place on a wire rack to harden.
Your eggs will likely come out much smoother and prettier than mine. I was using a mixture of new almond Bark along with some that I had saved from a previous use and the old Bark did not melt completely so I got lumps. Know what? The kids will never notice. Aren't they wonderful? The kids that is.
Anyway, enjoy your eggs. They take a little time but are certainly easy and cost next to nothing to make. Sure beats a dollar a piece at the grocery store and we can actually pronounce all of these ingredients.

Easy to Make Chocolate/Marshmallow Eggs

Saving on things like Easter candy is not as hard as it might seem. One of my favorites has been the chocolate covered marshmallow eggs. Once upon a time, they were inexpensive. These days there is less money left over for fun stuff and the prices just aren't what they used to be.
Yesterday, I stumbled upon marshmallows at the grocery store. I noticed them because they were not on the candy aisle or on the baking/goody-making aisle but turned up on the juice aisle tucked below the endless rainbow of bottles and mixes. In addition to the regular marshmallows and the minis, I was surprised to find colored ones, flat ones, stacked ones and gigantic ones. No wonder shopping has become stressful. But that's another story and don't get me started on cereal variations.Anyway, and probably because I had just made the chocolate covered peanut butter eggs, I thought I might try coating a few marshmallows. But, by the time I got home, just dunking the marshmallows in chocolate had lost its appeal. "If they were only shaped like eggs", I thought. Hummm. Not as easy as my mental image. Even with the scissors dusted with powdered sugar, they still gathered goo and had to be scraped clean with a knife from time to time. My egg shapes were far from perfect but close enough. I tossed the trimmed marshmallows in a bag with a little powdered sugar and it kept them from sticking together perfectly. My hands were tired from trimming with the sticking scissors after a bakers dozen, and since this was a trial endeavor, I stopped there.
With so few to coat, I microwave-melted only a single square each of chocolate and vanilla Almond Bark and added solid shortening for thinning, according to the package directions. Dipping was easier than ever because I stabbed the marshmallows with a small skewer (even a toothpick would work). Then, just spooned the coating over. One thing I did discover was the need to tap off as much of the extra powdered sugar as possible. Anyway, the entire project was super simple and incredibly inexpensive. It would be a fun activity with children regardless of the season.

One of these days, when I have endless hours to search, I'll try to find my old West Virginia recipe for making the real chocolate coating which, as I recall, included paraffin. In the meantime, the Almond Bark works great and nothing could be easier.

Silly Easter Eggs & Pound Cake

Uh Oh! Did we do that?I've seen these silly egg faces in email forwards over the years. Usually they've been arranged in clever photo still-life's with eggs broken in a puddle of innards or screaming beside a skillet containing one of their friends. Though I get a kick out of the professional photos, I guess I'm not that motivated. But I did remember that I made faces and stands years ago for grandchildren who are now expecting children of their own. On that long ago occasion, I planted Alfalfa to grow as hair. Here in my corner of the Florida panhandle, where the late 20th century is yet to arrive, Alfalfa seed is unavailable for sprouting as a food source. So, I've had to make do with Bermuda Grass seed and will post a photo as soon as these characters develop "hair".
The process is incredibly simple. Try to crack your eggs above the center line so you have more "face" space. Rinse and set aside until enough are accumulated for your project. Make stands or "necks" by rolling cardboard into tubes about the diameter of a quarter and an inch or so tall. Wrap the tube "necks" with white paper and decorate with whatever scrap materials you may have on hand: bits of ribbon, lace, gimp or buttons or simply draw a collar with colored markers or fabric paint. If using fabric paint, remember that it needs quite a bit of time to dry. I forgot.
Fill the egg shells with potting soil and water carefully. I use an eye dropper for watering.
Sprinkle the soil surface with seeds, cover them with a tiny bit more soil, water again and place them in a sunny window...watering daily.
If you are only making a few, it might be fun to make a cartoon conversation "balloon" to display a caption. My captions are: Bottom Left - "Uh oh! Did we do that?" Top Left - "I got red paint on your Easter Dress!" Top Right - "Don't lick your face. Use a napkin." Bottom Right - "Good Grief!"
HERE ARE SOME FACE IDEAS TO GET YOU STARTED
If you need an excuse to crack a bunch of eggs, give this Pound Cake a try. It's a family recipe handed down by my step mother, is "no fail" and unbelievably moist and delicious.

Lora's Sour Cream Pound Cake
  • 3 c. Sugar
  • 1 c. sour Cream
  • 6 Eggs - separated
  • 2 sticks Butter - (do NOT substitute)
  • 3 c. Plain Flour
  • 1/4 tsp Baking Soda
  • 1 tsp Vanilla Extract
Preheat oven to 300. Cream butter and sugar together until very creamy. Add egg yolks, one at a time while beating well after each addition. Sift flour 3 times. Add soda to sour cream and stir well. Add flour and sour cream to butter-sugar-egg mixture. Beat well. Add Vanilla and fold in egg whites. pour into well greased, lightly floured tube pan. Bake at 300 for 1 1/2 to 2 hours. Cool on rack.
*****
EGG "HAIR" UPDATE
After almost 2 weeks, there is finally some "green" up top. I don't know what I was thinking time-wise, other than I expected to be tying pony tails and trimming flat-tops by now. But there's still more than a week before Easter. Sure wish I could have used alfalfa seed.

Easter Egg Ideas

Photos will be posted in time for Easter 2011.
Eggheads with Green Hair
Cut an inch or so from a paper towel or toilet tissue tube to use as a stand for your egghead. Attach a paper collar to the tube or use a piece of ruffled lace for a collar. Fill an empty half egg shell with dirt and plant it with barley grass or alfalfa seeds, water enough to dampen soil completely and carefully dry the shell. Draw a face on the shell with a Sharpie and place it on the tube collar in a sunny window sill. Add a drop or two of water each day and wait for the "hair" to grow.
Simply Silly Hard Boiled Eggs
Not every egg needs to be colored to please a child...or an adult. Even if you're not an artist, grab a Sharpie and get creative drawing faces on plain, white, boiled eggs. Check the funny papers for facial expressions and let your imagination work overtime. Snuggle 2 Sweetheart face eggs together. Tuck one with an exaggerated expression of surprise into a child's lunch box. Nest a few together with cracks drawn on some and two wide eyes peering from a darkened crack in one.


Try an Easter Egg Tree
Make a beautiful, delicate centerpiece or decoration for a side table. Select a branch with many little twigs while on a nature walk. Spray it white and prop it in a vase or set it in plaster of paris in a small flower pot. Tie pastel ribbons into bows randomly along the branches and hang blown and colored eggs with pieces of ribbon.